Faux & wooden venetian blinds install guides
Use our step-by-step guides to install your new blinds like a pro. We have installation guides for inside and outside fit.
Inside fit
Getting started
Be careful not to damage the blind or cords when removing the packaging. Unpack the blind and check the following parts are included:
- Venetian blind
- 1 x pair of end brackets (plus centre brackets depending on blind width)
- 2 x screws per bracket
- 1 x pelmet with velcro tabs
Tools required:
- Pencil
- Tape measure
- Electric screwdriver
- #2 square drive
Illustrated steps
Step 1
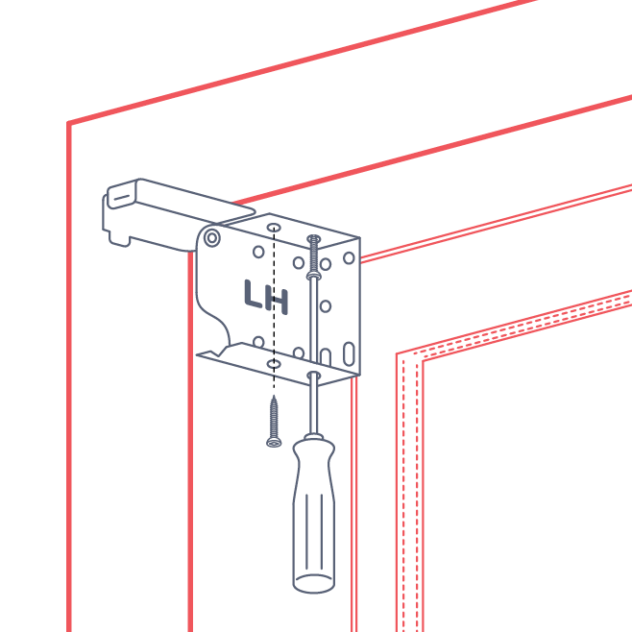
1 x LH bracket
2 x screws
Fix the back of the left bracket (labeled LH) 80mm from the front of the top left-hand corner of the window using the two screws provided.
Step 2
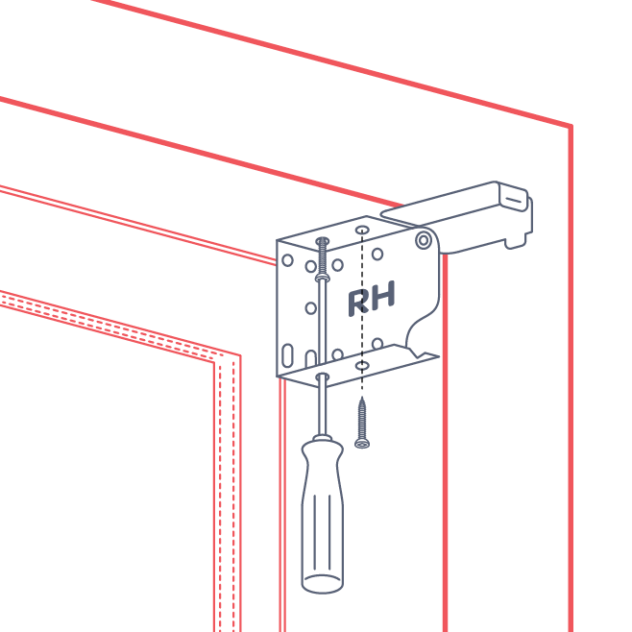
1 x RH bracket
2 x screws
Fix the right bracket (labeled RH) inside the window frame in the top right-hand corner of the window in the same manner. Ensure that the back of the right bracket is in line with the back of the left bracket.
Step 3
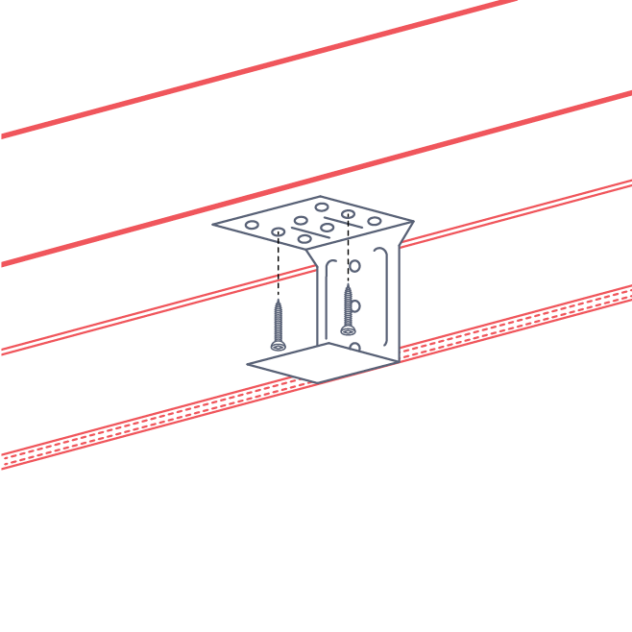
Centre brackets (if supplied)
Screws (if supplied)
If the blind includes centre brackets space them evenly between the end brackets being careful to ensure that they do not line up with the strings in the top of the blind when installed.
Ensure that the backs of the centre brackets are in line with the back of the left and right brackets.
Step 4
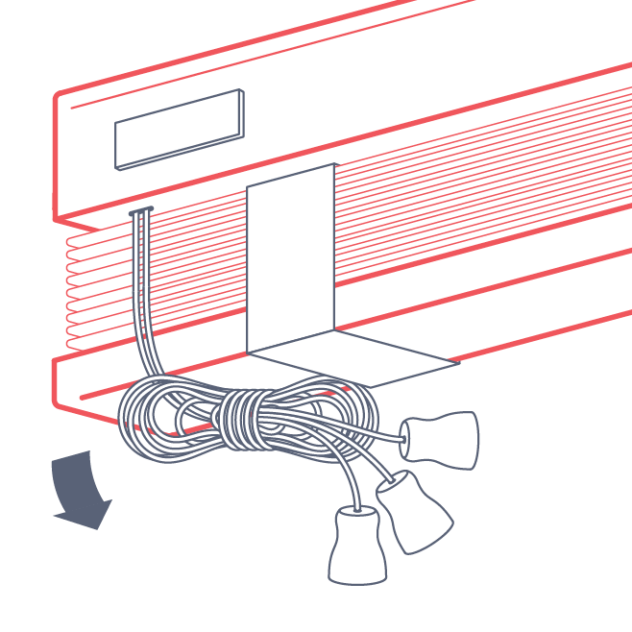
Remove the control cord bundle from the top of the headrail, leaving the fabric ties that hold the blind together.
Step 5
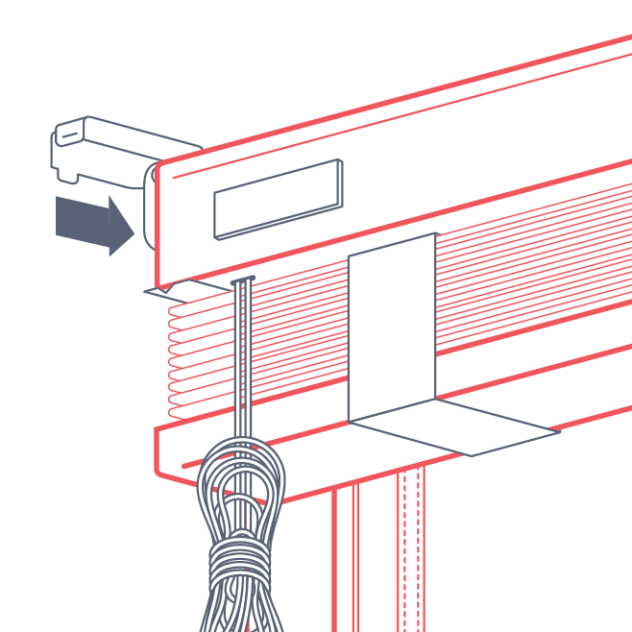
Open the end bracket latches and place the headrail into the brackets, keeping your control cords on the correct side.
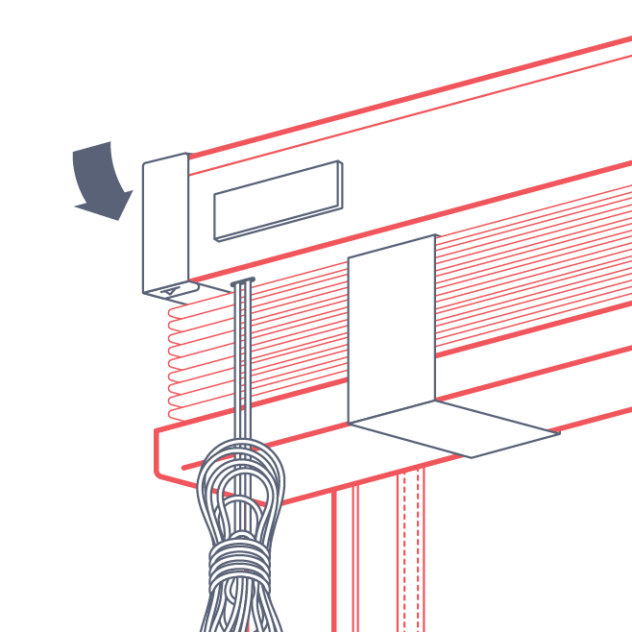
Close the latches firmly and ensure they ‘click’ closed.
Step 6
1 x pelmet Velcro tabs
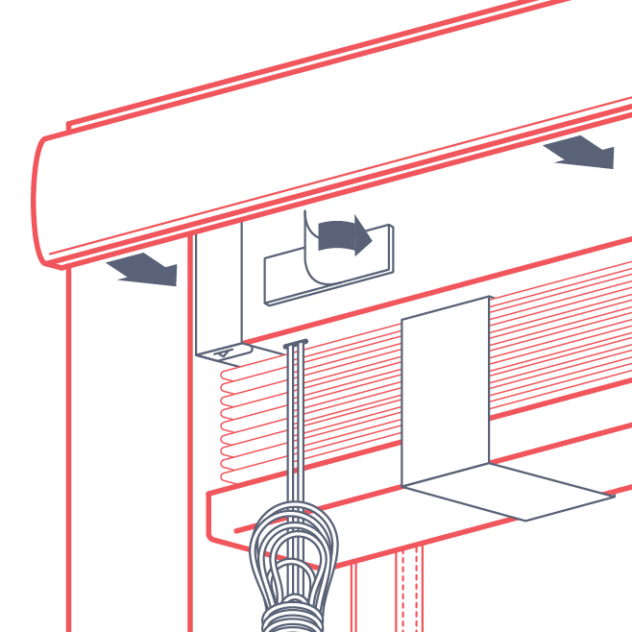
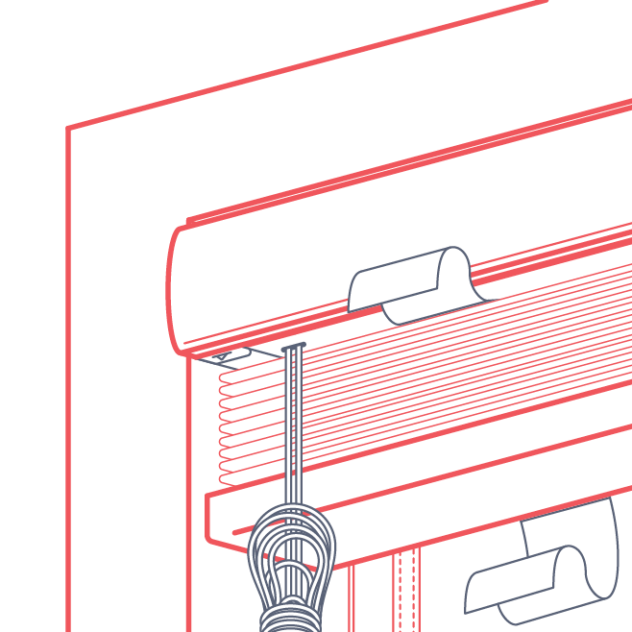
Peel the tape off the Velcro tabs attached to the headrail. Position the pelmet level with the top of the blind and attach by pressing firmly against the Velcro tabs.
Step 7
While holding the blind in place, carefully untie the fabric straps.
Blind operation: To lower, hold the group of cords across the face of the blind and pull gently to release the cord lock before lowering the blind. Tilt the blind using the two tassels.
Outside fit
Getting started
Be careful not to damage the blind or cords when removing the packaging. Unpack the blind and check the following parts are included:
- Venetian blind
- 1 x pair of end brackets (plus centre brackets depending on blind width)
- 2 x screws per bracket
- 1 x pelmet with velcro tabs
Tools required:
- Pencil
- Tape measure
- Electric screwdriver
- #2 square drive
Illustrated steps
Step 1
1 x LH bracket
2 x screws
At the position originally measured from, fix the left bracket (labelled LH) to the architrave or wall using two of the screws provided.
Tips: If positioning near the edge of the frame/architrave, pre-drill the holes to prevent splitting. If fixing to the wall you may need to pack out the brackets and use longer screws to allow the blind to clear the window reveal when installed.
Step 2
1 x RH bracket
2 x screws
Repeat step 1 but on the right side using the bracket labelled RH.
Step 3
Centre brackets (if supplied)
Screws (if supplied)
If the blind includes centre brackets, space them evenly between the two end brackets being careful they do not line up with the strings in the top of the blind when installed.
Step 4
Remove the control cord bundle from the top of the headrail, leaving the fabric ties that hold the blind together.
Step 5
Open the end bracket latches and place the headrail into the brackets, keeping your control cords on the correct side.
Close the latches firmly, ensuring they ‘click’ into place.
Step 6
1 x pelmet Velcro tabs
Peel the tape off the velcro tabs attached to the headrail. Position the pelmet level with the top of the blind and attach by pressing firmly against the velcro tabs.
Step 7
While holding the blind in place, carefully untie the fabric straps.
Blind operation: To lower, hold the group of cords across the face of the blind and pull gently to release the cord lock before lowering the blind. Tilt the blind using the two tassels.