Chain roman blinds install guides
Use our step-by-step guides to install your new blinds like a pro. We have installation guides for inside and outside fit.
Inside fit
Getting started
Be careful not to damage the blind when removing the packaging and check that the following parts are included:
- Roman Blind, chain controlled
- Top fix brackets with 1 x screw per bracket (number of brackets depends on the width of the blind)
- Chain tensioner
Tools required:
- Pencil
- Tape measure
- Power drill with a 3mm drill bit
- #2 square drive for the mounting brackets
- #2 square screwdriver
Illustrated steps
Step 1
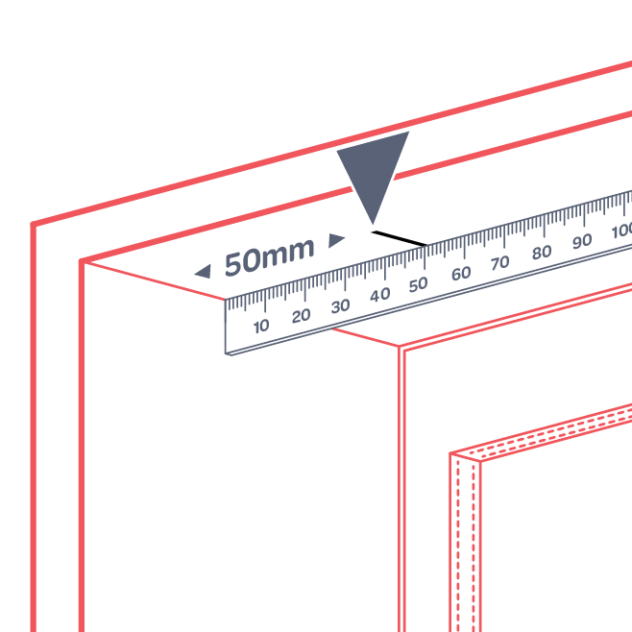
Measure in 50mm from the top left corner of the window frame and make a mark.
Step 2
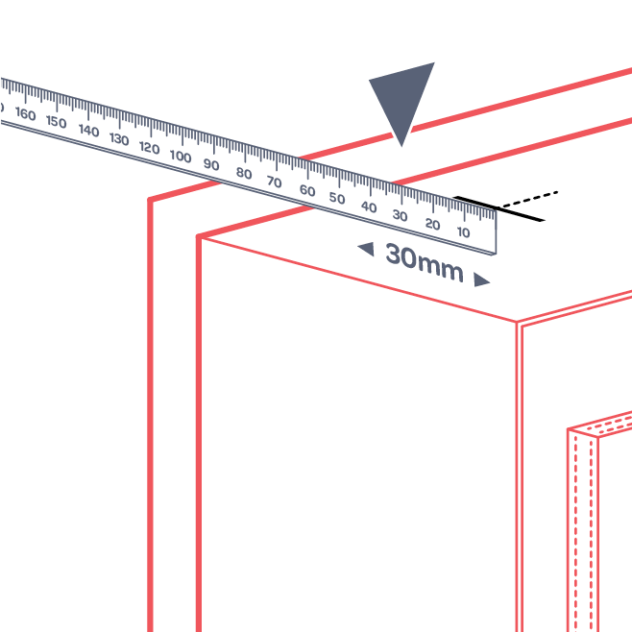
Measure back from the front of the window frame 30mm and make a cross on your first mark to fit your blind at the front of the sill. To fit the blind closer to the glass, measure further back.
Repeat steps 1-2 on the right side, ensuring you measure the same distance from the front of the window frame.
Step 3
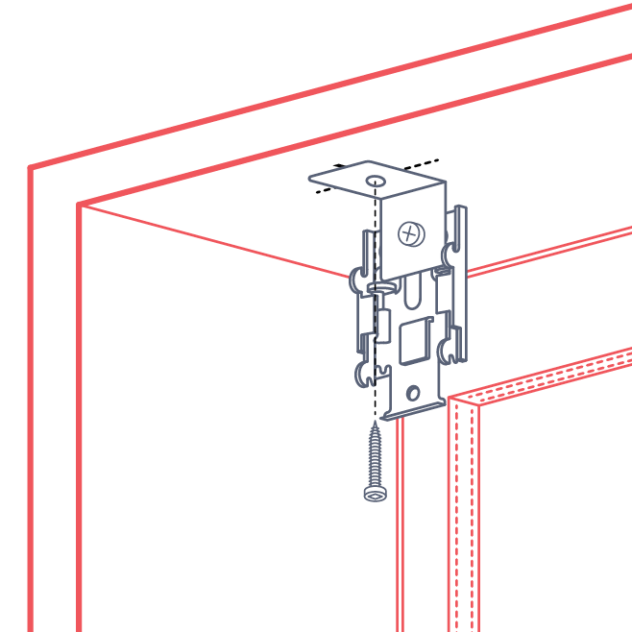
Pre-drill a hole using a 3mm drill bit and fix a bracket at each site using a single screw up through the bracket.
Position the bracket with the short side up and the long side to the back. Space the remaining brackets evenly between the first and last.
Step 4
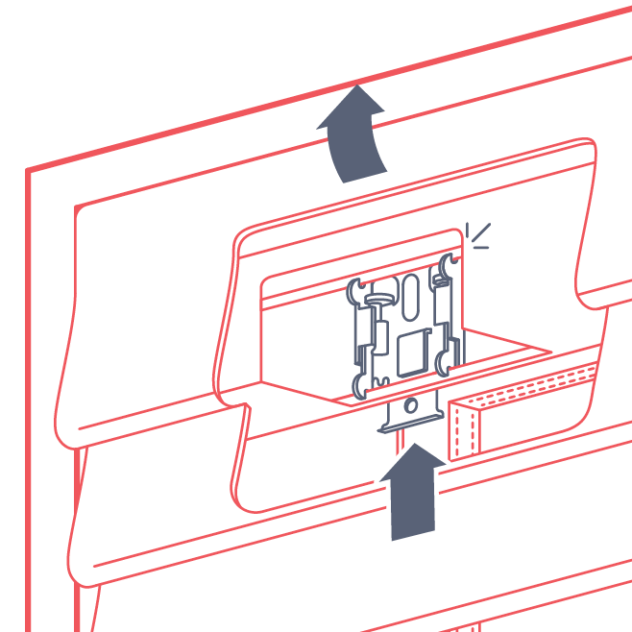
Raise the blind into place and starting in the middle, hook the headrail under the lower hook on the bracket. Push up on the headrail while tilting the top of the blind away from you to ‘click’ the top of the headrail into place. Repeat with the remaining brackets.
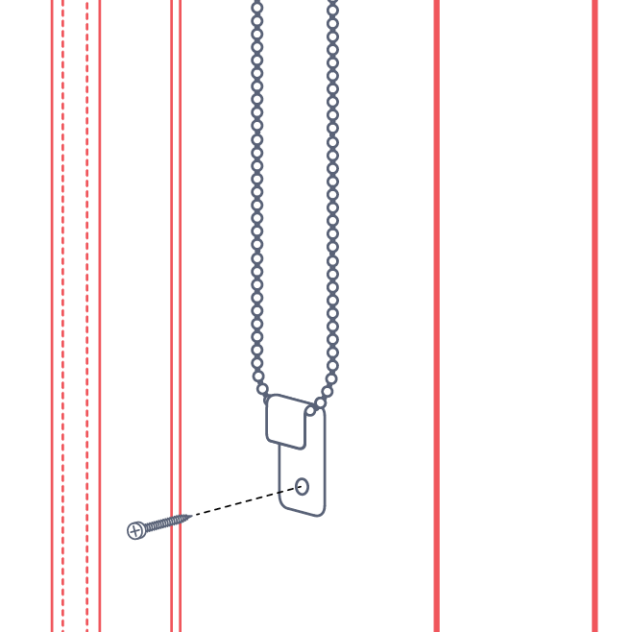
Step 5
Slip a chain tensioner over the chain and let it fall to where it will sit naturally. Fix the tensioner to the wall by pre-drilling a hole before fixing with the screw provided.
Tip: For easier operation, don’t make the chain too tight.
Outside fit
Getting started
Be careful not to damage the blind when removing the packaging and check that the following parts are included:
- Roman blind, chain controlled
- Outside fitting brackets with 1 x screw per bracket (number of brackets depends on the width of the blind)
- Chain tensioner
Tools required:
- Pencil
- Tape measure
- Power drill with a 3mm drill bit
- #2 square drive for the mounting brackets
- #1 square drive for the chain tensioner
Illustrated steps
Step 1
Find the position you originally measured from when ordering your blind. Measure in 50mm from each end of the blind and make a mark. This is where your end brackets will go.
If fixing to the wall you will want to find wood behind the wall lining (plasterboard). If no wood is available here, check at locations 100mm and 150mm in from each end and attach brackets here if you find wood. If there is still no wood available, place a mark at the first available wood and another 50mm in from each end.
Tip: Use a stud finder to find wood.
Step 2
Place a mark for each remaining bracket, ensuring they are evenly spaced between the end brackets.
Step 3
Next, measure down 25mm from where the top of the blind will sit to create a cross on the marks.
Tip: If installing a floor length blind, measure up from the floor the length of the blind drop less 30mm instead, and place a cross on your marks.
Step 4
Pre-drill holes using a 3mm drill bit on the crosses and fix a bracket at each site.
Step 5
Raise the blind into place and starting in the middle, hook the headrail under the lower hook on the bracket. Push up on the headrail while tilting the top of the blind away from you to ‘click’ the headrail into place. Repeat with the remaining brackets.
Step 6
Slip a chain tensioner over the chain and let it fall to where it will sit naturally. Fix the tensioner to the wall by pre-drilling a hole before fixing with the screw provided.
Tip: For easier operation, don’t make the chain too tight.
Note: Our illustrations show the blind fitting to the architrave of the window but you may have measured to fit to the wall above the window frame.