Elegance shades
Getting started
Take extreme care when transporting, moving, storing, or unwrapping the blinds, as the fabric can be easily marked or dented. To protect the material during handling, we recommend wearing clean white gloves.
Tools required:
- Drill (Phillips head bit)
- Tape measure
- Level
- String
- Pencil
- Drop cloth
- Ladder if required
Download elegance shades guide
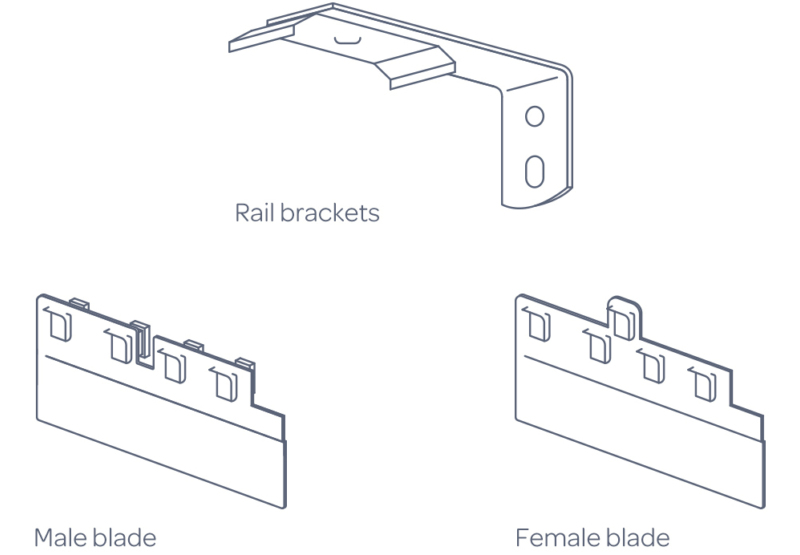
Overview
- Rail brackets
- Male blade
- Female blade
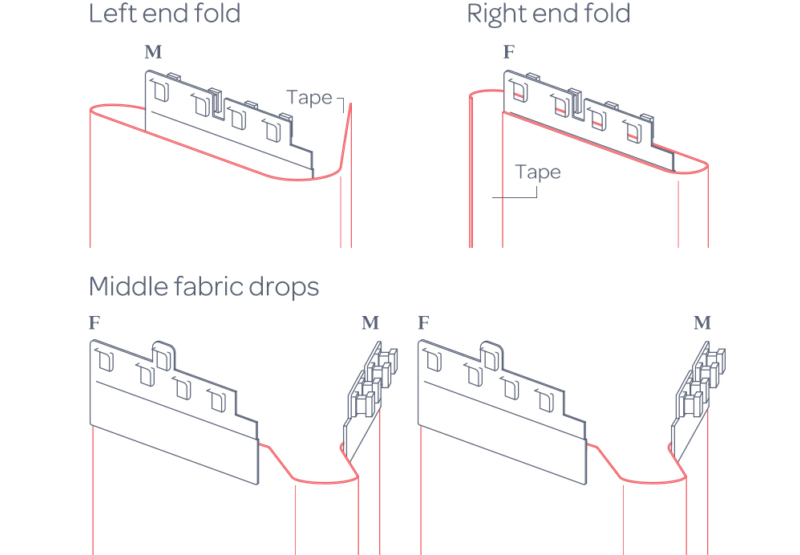
Looking from the front, this diagram shows the relationship between male and female blades and the fabric drops.
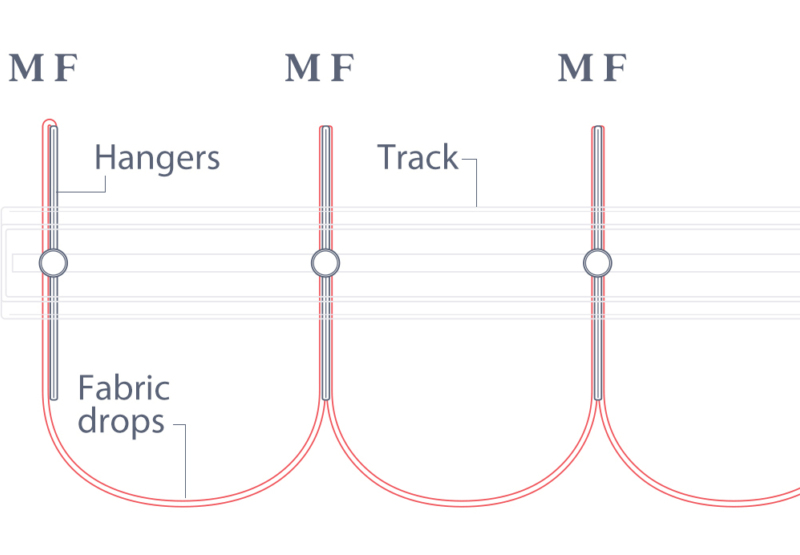
Looking from above, this diagram shows the blades and fabric drops once clipped together.
Hang the blades in alternating order: male (M), female (F), male (M), female (F), and so on. Finishing with the female end blade.
Illustrated steps

Step 1
Install brackets:
- Use a level to establish a straight, square line at the correct height (as specified in your order form).
- Secure the first bracket to the wall, allowing for adjustment.
- Install the second bracket at the opposite end, checking that both brackets follow the level line and are square.

Step 2
Install support brackets and track:
- Run a level line between the two end brackets as a reference.
- Measure and mark positions for additional support brackets.
- Install the support brackets, ensuring they are square and evenly spaced.
- Tighten the secondary locking screws on all brackets.
- Clip the track into place.

Step 3
Unbox fabric blades:
- Lay down a clean drop cloth and wash your hands before handling the fabric blades.
- Carefully open the box using scissors.
- Place the roll of fabric blades on the drop cloth and gently unroll it.
- Set aside the first and last blades, these are the end blades.

Step 4
Prepare end blades for hanging:
- Female end blade: Wrap the fabric securely around the hanger halves and press the folds together.
- Male end blade: Wrap the fabric securely around the hanger halves and press the folds together.

Step 5
Hang fabric blades
- Hang the female end blade on the track first.
- Ensure the mesh fabric faces into the room.
- Clip the plastic hangers onto the track, starting with the female hanger.
- Join the male and female hangers together, with the front fabric pieces touching.
- Continue folding, joining, and clipping the remaining blades in sequence.

Step 6
Check folds and curves:
- Make sure all blades are in the open position.
- Gently slide the shades to test movement.
- Fully open and close the shades in both directions to confirm smooth operation.