Vertical blinds install guides

Use our step-by-step guides to install your new blinds like a pro. We have guides for inside and outside fit.

Inside fit

Getting started

Being careful not to damage the blind or cords when removing the packaging, unpack the blind and check all parts are included:

  • 1 x vertical head rail
  • Top fix clips with 1 x screw per clip
  • Vertical slats with chains attached
  • 1 x cord and 1 x chain tensioner

Tools required:

  • Pencil
  • Tape measure
  • Electric drill with #2 square drive or screwdriver equivalent for the mounting brackets
  • #1 square drive for the cord tensioner

Illustrated steps

Vertical Installation Guides Inside Fit WEB Step 1a

Step 1

Check for door handles and window catches that could interfere with blind function. Adjust bracket position to suit.

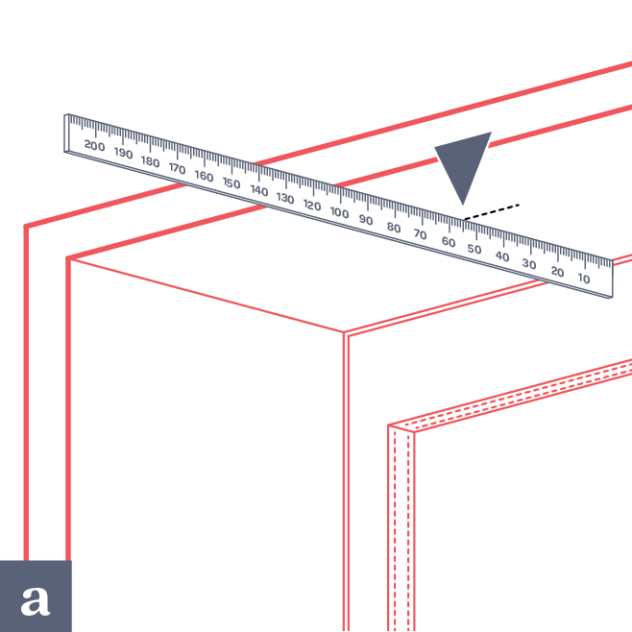
a. Mark halfway depth position. Position brackets halfway between the rear and the front of the frame with a minimum of 55mm clearance from the rear (glass) to allow the blades to turn.
Vertical Installation Guides Inside Fit WEB Step 1b

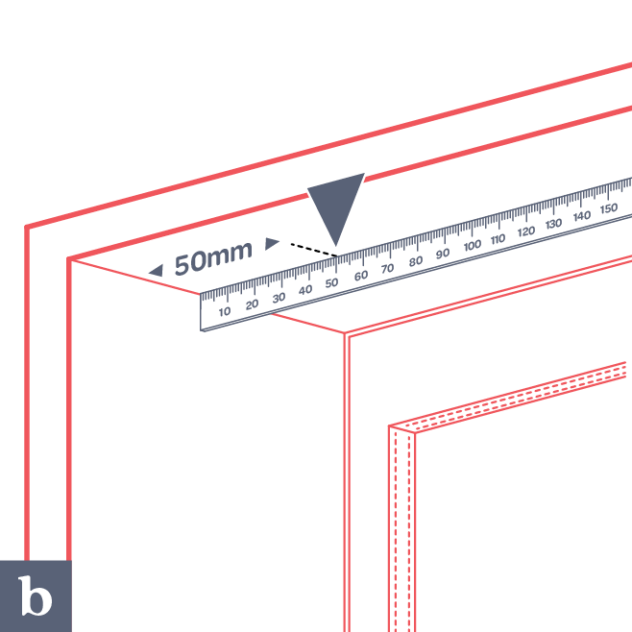
b. Mark 50mm from frame edge. Where these marks intersect is your screw hole position.
Vertical Installation Guides Inside Fit WEB Step 2

Step 2

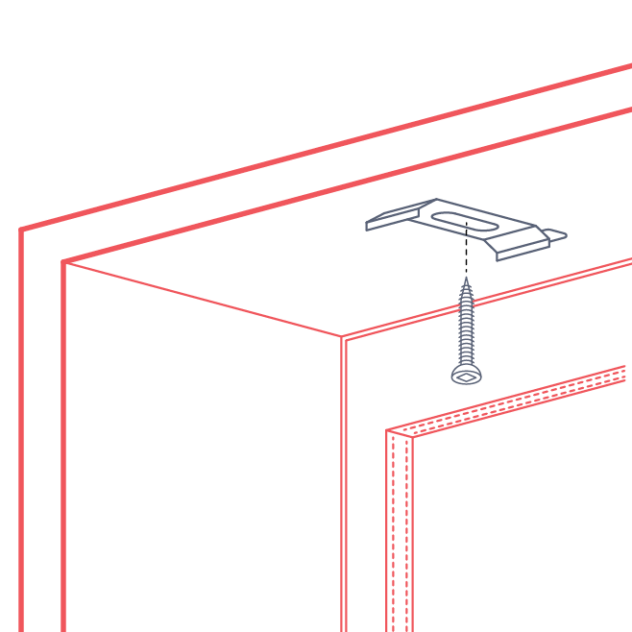
Pre-drill a hole on this mark before fixing the first bracket with the long tab of the clip facing towards the rear, away from you.

Repeat this procedure at the other end of the frame for the last bracket.

Fix the bracket in at the same frame depth as the first bracket.
Vertical Installation Guides Inside Fit WEB Step 3

Step 3

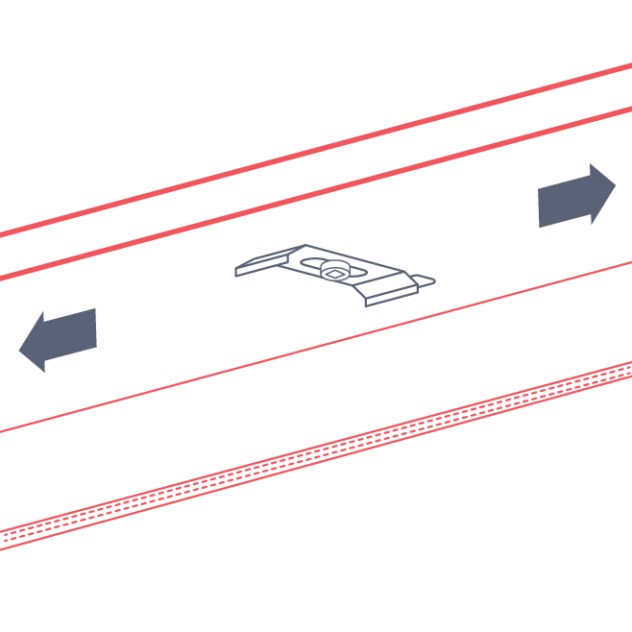
Now position and fix the additional brackets evenly between the first and last brackets and at the same sill depth.

Note: Read the supplied paperwork to ensure the control side of the headrail is on the correct side. Left control to the left side or right control to the right side and follow step 4.
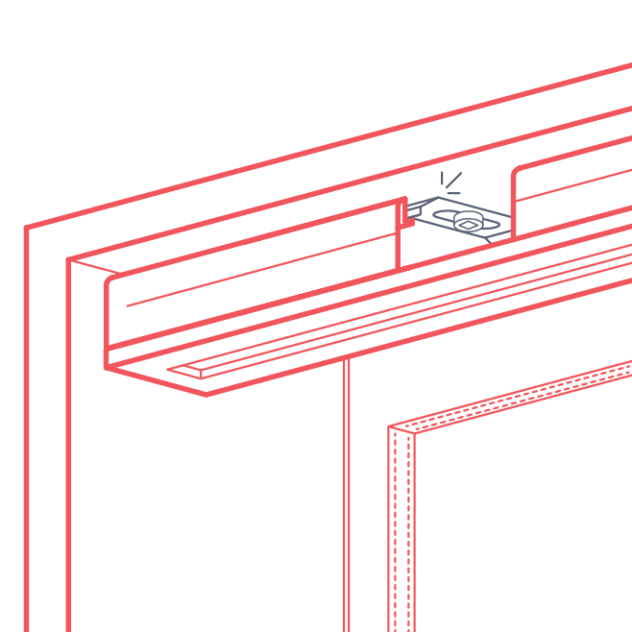
Vertical Installation Guides Inside Fit WEB Step 4

Step 4

Hold the vertical headrail close to the brackets. Fit the front lip of the headrail into the front lip of the brackets. Rotate the rear of the track up and forward to snap the track into place.
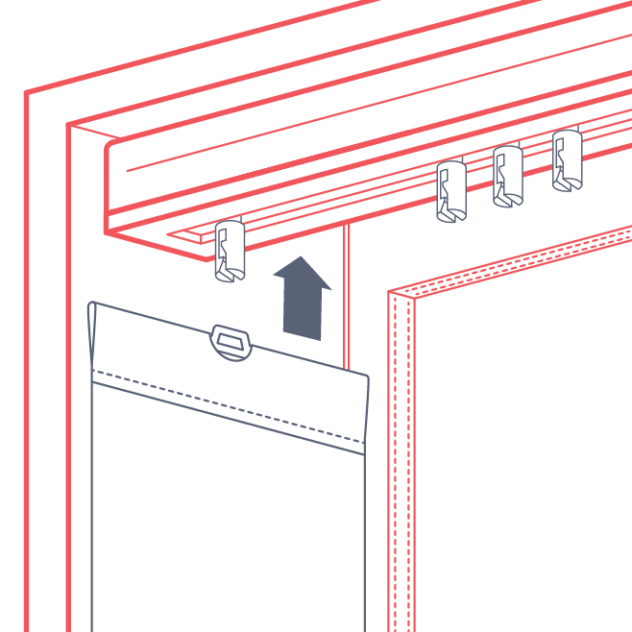
Vertical Installation Guides Inside Fit WEB Step 5

Step 5

Fitting the slats. Using the cord and chain, rotate the headrail carriers to the open position. Unroll the slats carefully

and keep together. Each blind is sent with an extra slat.

Take the first slat and insert into the carrier clip of the headrail. Gently raise the hanger and click into place.

Continue along the headrail inserting the slats until finished. Rotate the chain to check the slats open and close together. Pull the cord to ensure the blind traverses smoothly in both directions along the headrail.
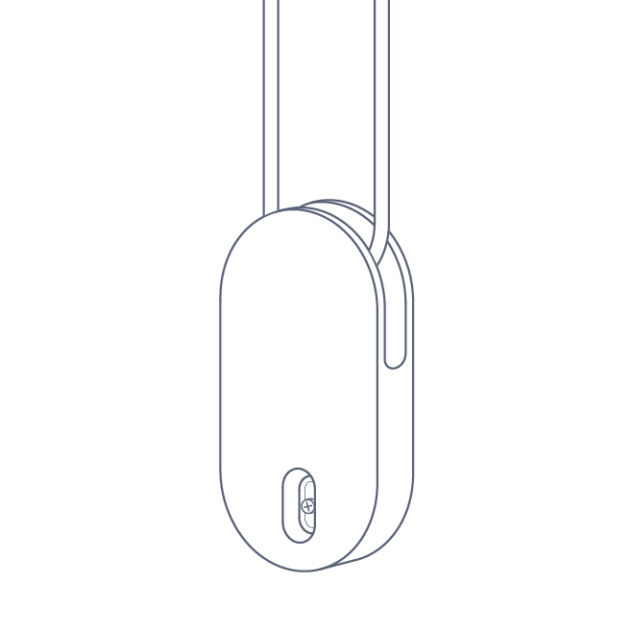
Vertical Installation Guides Inside Fit WEB Step 6a

Step 6

Using the screws provided, secure the child safety tensioner for both the chain and cord to the inside of the window frame.
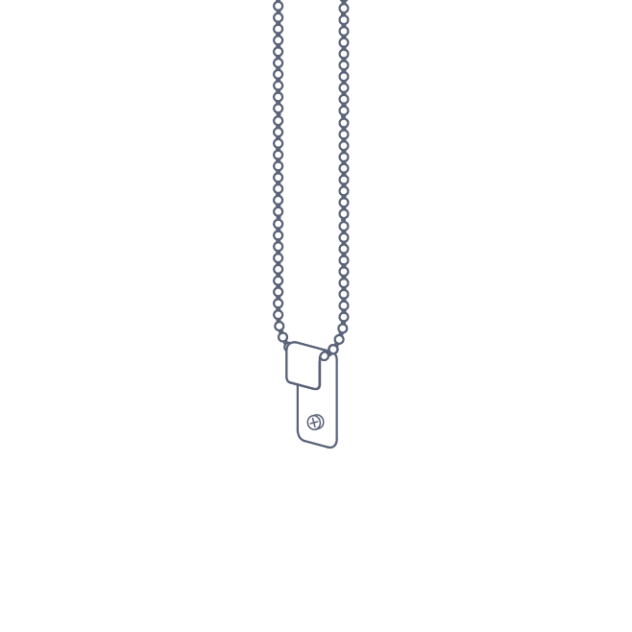
Vertical Installation Guides Inside Fit WEB Step 6b

Tip: Don’t pull the chain tensioner too tight, leave a little bit of give to make operating the blind easier.

Tips:

Should a blade become misaligned, rotate the blades to the closed position using the chain. Once closed, slowly but firmly continue to pull on the chain. Once you hear a clicking sound, continue to pull until the blades are back in alignment.

Should you need to release the headrail at any stage, push upwards on the rear lip of the clip with your thumb or a flat bladed screwdriver and the headrail will release and pivot downwards.

Outside fit

Getting started

Being careful not to damage the blind or cords when removing the packaging, unpack the blind and check all parts are included:

  • 1 x vertical head rail
  • Outside fit brackets with 1 x screw per bracket
  • Vertical slats with hangers and chains attached

Tools required:

  • Pencil
  • Tape measure
  • Electric drill with #2 square drive or screwdriver equivalent for the mounting brackets

Illustrated steps

Vertical Installation Guides Outside Fit WEB Step 1a

Step 1

Check for door handles and window catches that could interfere with blind function. Adjust bracket position to suit.

a. Place a mark 50mm in from the left-hand side of where the blind was measured from. In this image, the blind was measured from the outside edge of the window frame.

Vertical Installation Guides Outside Fit WEB Step 1b

b. Mark the position of the screw hole – If you measured the drop of the blind from the top of the architrave, measure down 15mm and place a mark across the line made in step 1a to mark the position of the screw hole with a cross. If you didn’t measure from the top of the architrave, measure from the bottom up, to the drop height less 15mm (found on your paperwork) to mark the position of the screw hole.

Vertical Installation Guides Outside Fit WEB Step 1c

Repeat steps 1a and 1b to fix the bracket on the right-hand side of the window.

Vertical Installation Guides Outside Fit WEB Step 2

Step 2

With any remaining brackets (supplied if required) space them evenly between the left and right brackets and attach the same way.

Read the supplied paperwork to ensure the control side of the headrail is on the correct side. Left control to the left side or right control to the right side and follow step 3.

Vertical Installation Guides Outside Fit WEB Step 3

Step 3

Hold the vertical headrail close to the brackets. Fit the front lip of the headrail into the front lip of the brackets. Rotate the rear of the track up and forward to snap the track into place.

Vertical Installation Guides Outside Fit WEB Step 4

Step 4

Fitting the slats. Using the cord and chain, rotate the headrail carriers to the open position. Unroll the slats carefully and keep together. Each blind is sent with an extra slat.

Take the first slat and insert into the carrier clip of the headrail. Gently raise the hanger and click into place.

Continue along the headrail inserting the slats until finished. Rotate the chain to check the slats open and close together. Pull the cord to ensure the blind traverses smoothly in both directions along the headrail.

Tips:

Should a blade become misaligned, rotate the blades to the closed position using the chain. Once closed, slowly but firmly continue to pull on the chain. Once you hear a clicking sound, continue to pull until the blades are back in alignment.

Should you need to release the headrail at any stage, push upwards on the rear lip of the clip with your thumb or a flat bladed screwdriver and the headrail will release and pivot downwards.