Honeycomb blinds install guides
Use our step-by-step guides to install your new blinds like a pro. We have installation guides for inside and outside fit.
Inside fit
Getting started
Be careful not to damage the blind or cords when removing from the packaging. Check the following parts are included:
- Honeycomb blind
- At least 2 x universal brackets with 1 x screws per bracket (number dependent on size of blind)
- 1 x cord cleat with 2 x screws (corded operation only)
Tools required:
- Pencil
- Tape measure
- #2 Phillips drive screwdriver
Inside fit illustrated steps
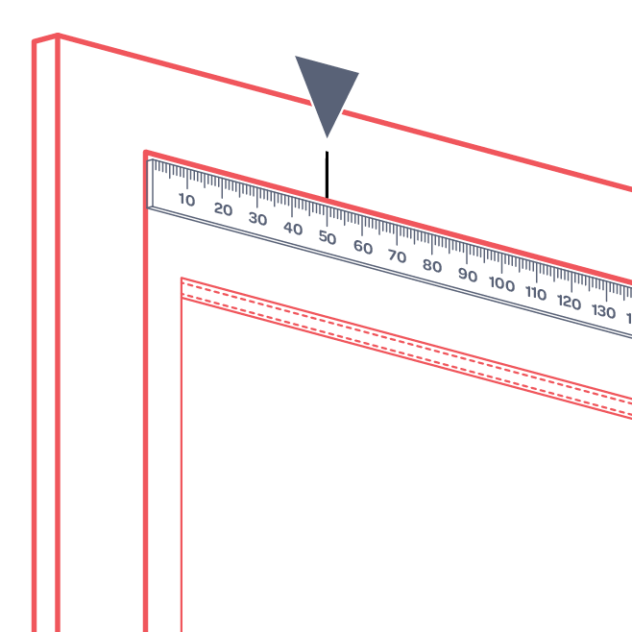
Step 1
Starting from the left top corner, measure 50mm along the top inside of the window frame and mark with a pencil; this will be the outer edge of the left bracket.
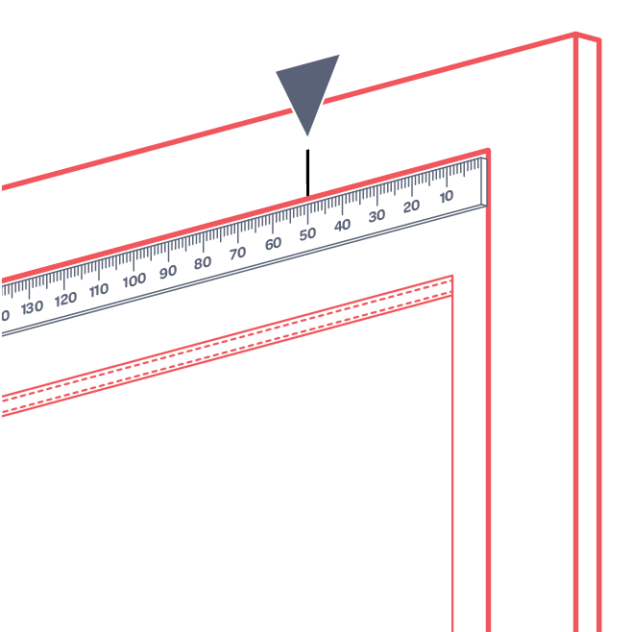
Step 2
Repeat step 1 from the right top corner. This marks the outer edge of the right bracket.
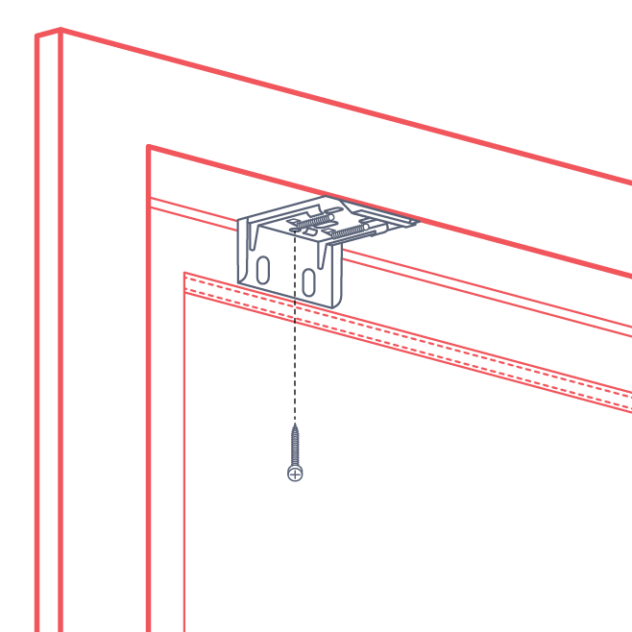
Step 3
1 x top fixing bracket
1 x screws
Line up the left edge of the bracket with the mark made in step 1 on the underside of the window frame. Screw bracket in place using the screws provided.
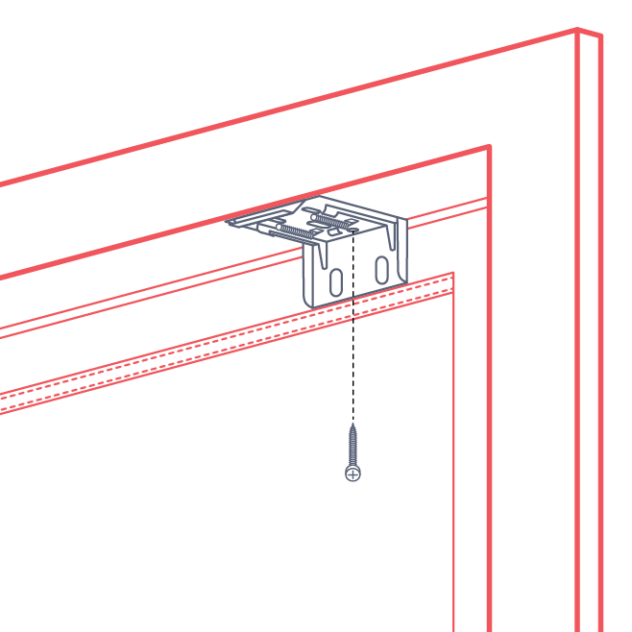
Step 4
1 x top fixing bracket
1 x screws + more brackets and screws as provided
Repeat step 3, this time lining the right side of the bracket up with the mark made in step 2. Space any remaining brackets evenly between the two outer brackets being careful they don’t line up with apparatus in the head rail (cordless option only).
Step 5
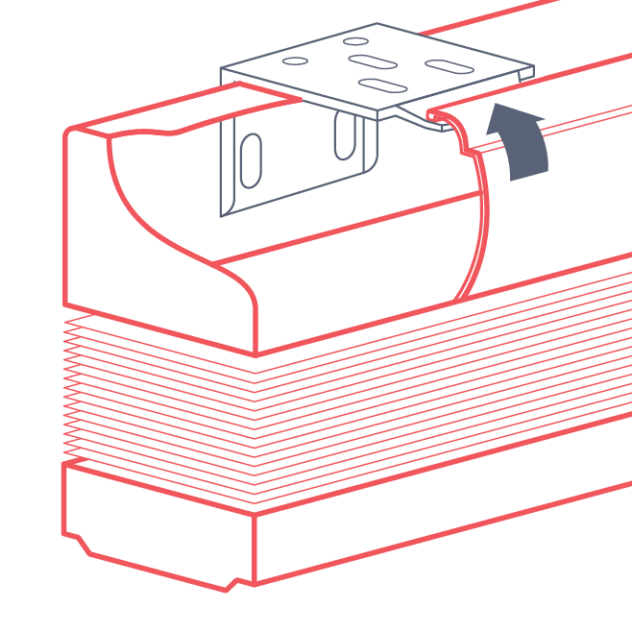
Line the blind up evenly across the brackets. Tilt the bottom of the blind toward you and ‘hang’ the top front edge of the headrail on the brackets.
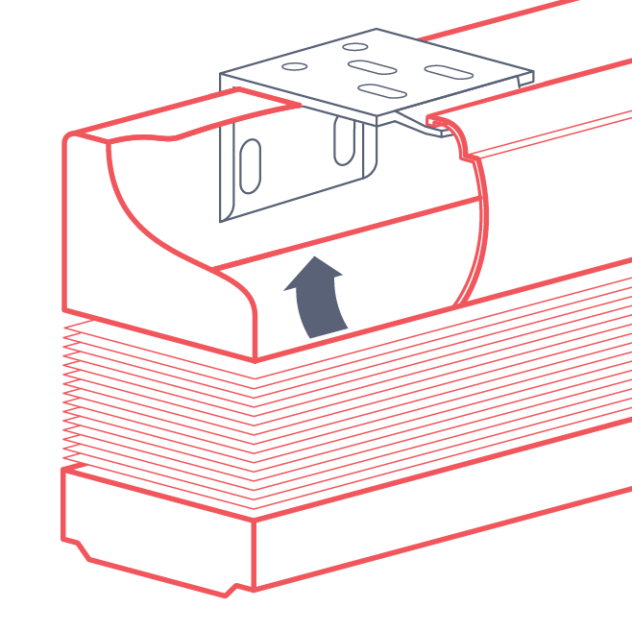
Tilt the bottom away from you and back to level then push the headrail away from you until you feel the top back edge of the headrail clip into the bracket.
Step 6 (corded blinds only)
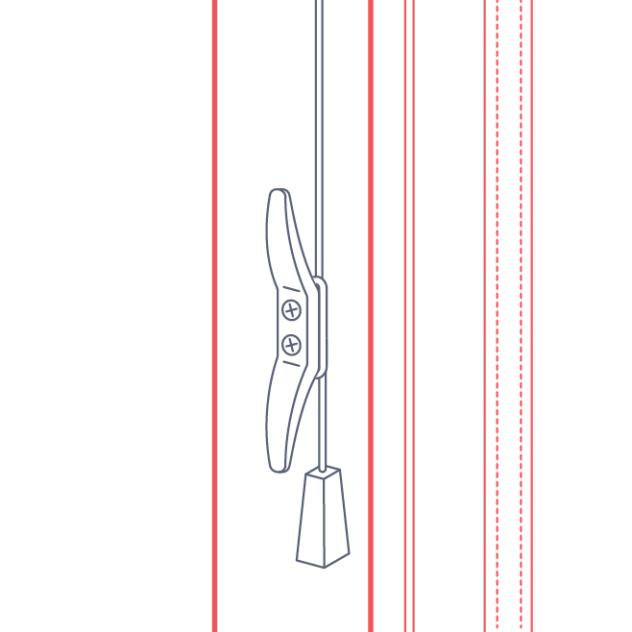
1 x cord cleat 2 x screws
Position your cleat on or outside the frame where it can be accessible for adults yet out of reach of small children. Avoid fixing in a position that may hinder the operation of the blind.
Blind operation: When first installed please allow 24 hours for your shade to drop completely to its actual height. To keep the blinds operating smoothly it is recommended to use them every 5 to 7 days to avoid the fabric sitting stationary long term.
Outside fit
Getting started
Be careful not to damage the blind or cords when removing from the packaging. Unpack the blind and check the following parts are included:
- Honeycomb blind
- At least 2 x top universal brackets with 2 x screws per bracket (number dependent on size of blind)
- 1 x cord cleat with 2 x screws (corded operation only)
Tools required:
- Pencil
- Tape measure
- #2 square drive
Outside fit illustrated steps
Step 1
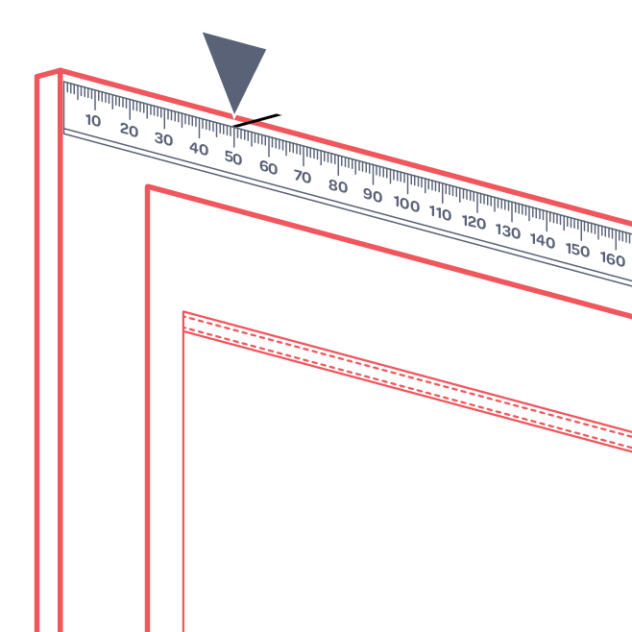
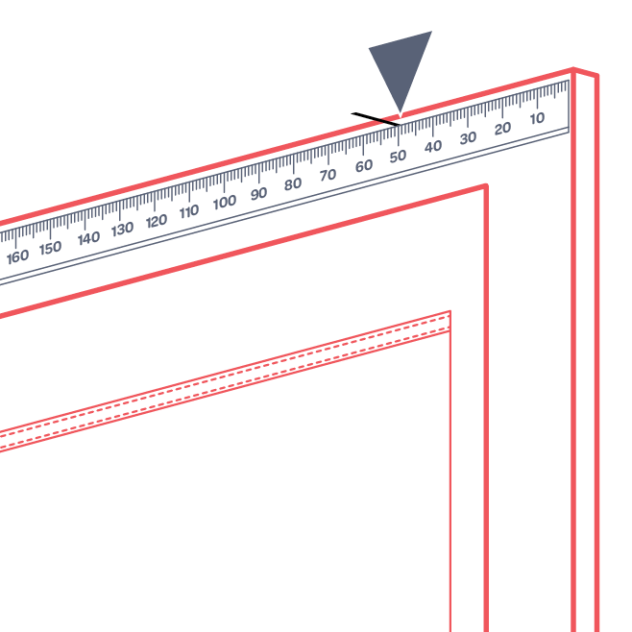
Starting from the left top corner, measure 50mm along the outside top of the window frame or wall above and mark with a pencil; this will be the outer edge of the left bracket.
Step 2
Repeat step 1 from the right top corner. This marks the outer edge of the right bracket.
Step 3
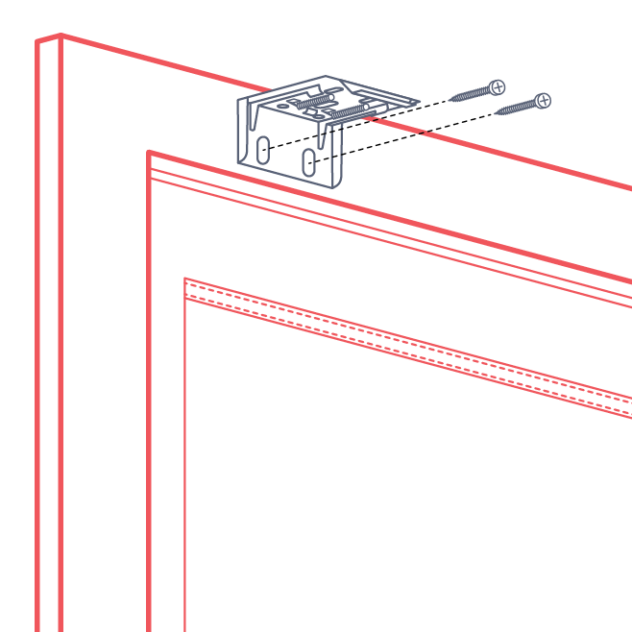
1 x universal bracket
2 x screws
Line up the left edge of the bracket with the mark made in step 1. Screw both screws inwards into the holes at the back of the bracket.
Step 4
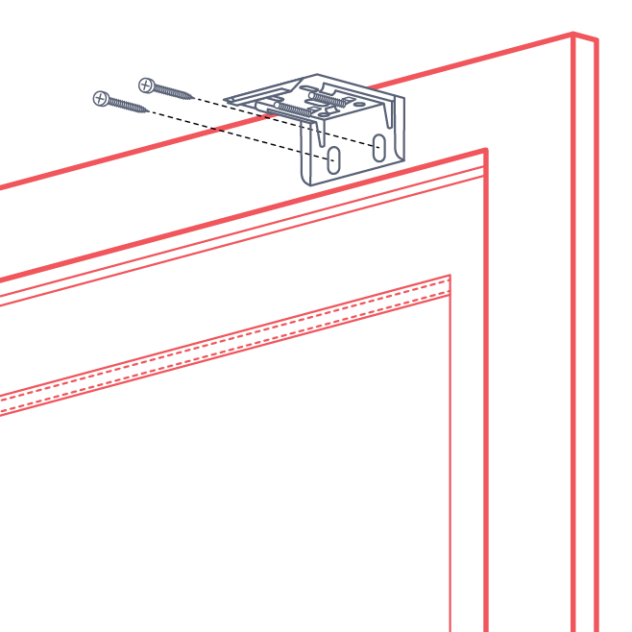
1 x top fixing bracket
2 x screws + more brackets and screws as provided
Repeat step 3, this time lining the right side of the bracket up with the mark made in step 2. Space any remaining brackets evenly between the two outer brackets being careful they don’t line up with apparatus in the head rail (cordless option only).
Step 5
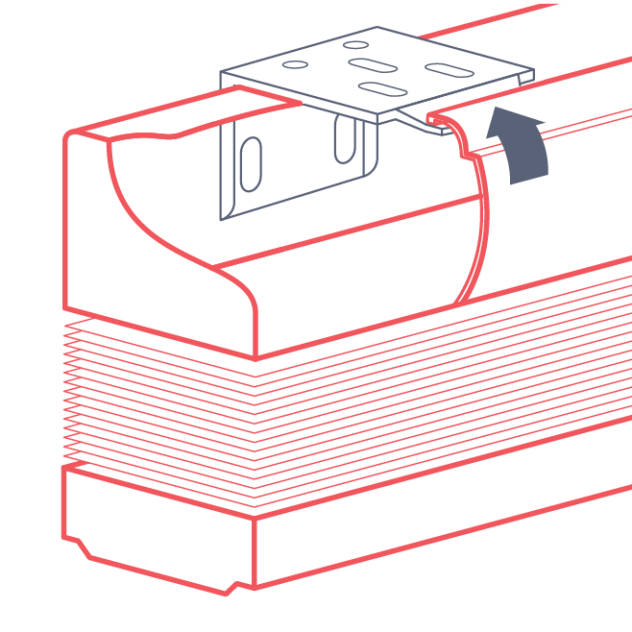
Line the blind up evenly across the brackets. Tilt the bottom of the blind toward you and ‘hang’ the top front edge of the headrail on the brackets.
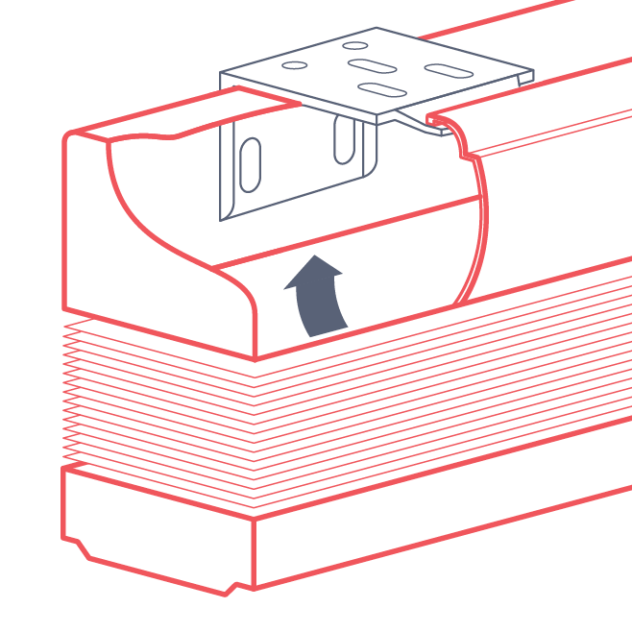
Tilt the bottom away from you and back to level then push the headrail away from you until you feel the top back edge of the headrail clip into the bracket.
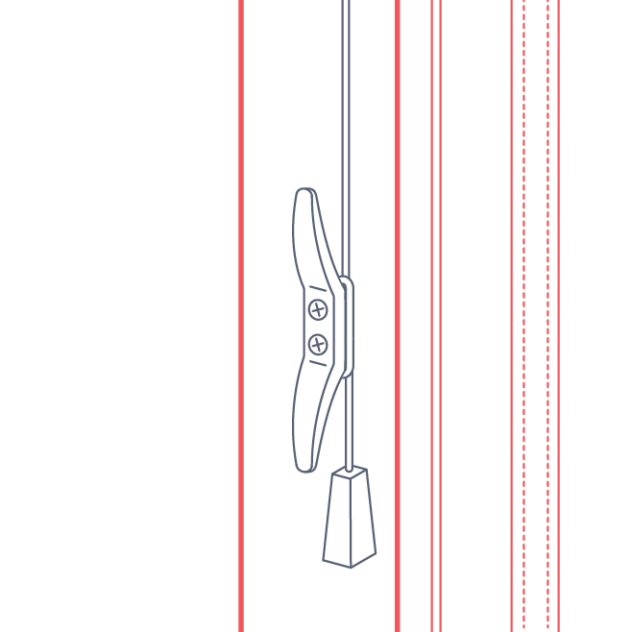
Step 6
(corded blinds only)
1 x cord cleat
2 x screws
Position your cleat on or outside the frame where it can be accessible for adults yet out of reach of small children. Avoid fixing in a position that may hinder the operation of the blind.
Blind operation: When first installed please allow 24 hours for your shade to drop completely to its actual height. To keep the blinds operating smoothly it is recommended to use them every 5 to 7 days to avoid the fabric sitting stationary long term.