Roller blinds install guides
Use our step-by-step guides to install your new blinds like a pro. We have installation guides for inside and outside fit.
Inside fit
Getting started
Being careful not to damage the blind or chain when removing the packaging, unpack the blind and check all parts are included:
- Roller blind
- 2 x universal end brackets
- 4 x screws
- 2 x ball stops
- 1 x child safety tensioner with screw
Tools required:
- Pencil
- Tape measure
- Electric screwdriver
- #2 square drive
Illustrated steps
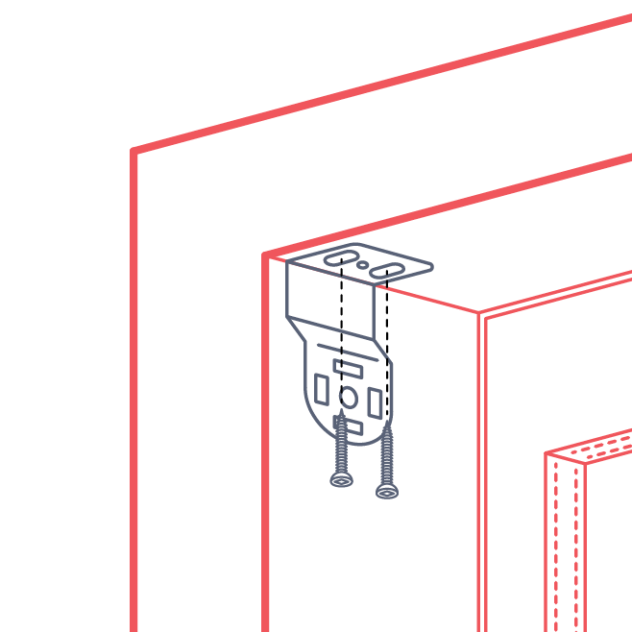
Step 1
1 x universal end bracket
2 x screws
Decide how far back in the sill you want your blind to sit and fix one universal end bracket inside the window frame in the top left hand corner of the window using two of the screws provided.
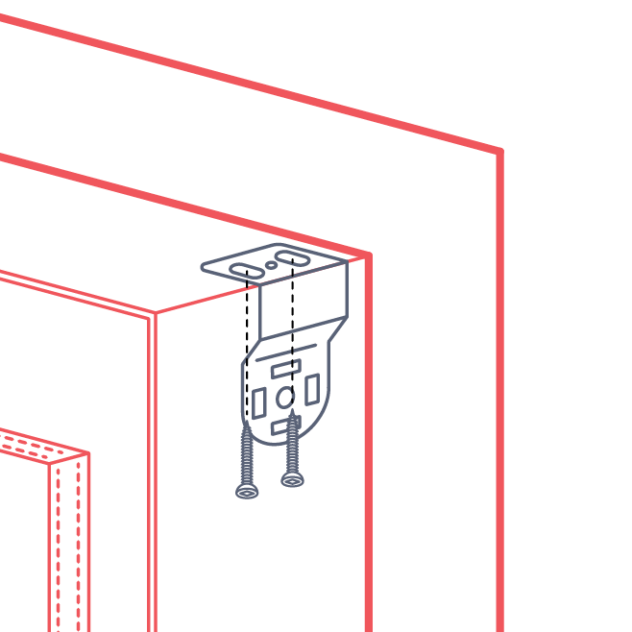
Step 2
1 x universal end bracket
2 x screws
Repeat step 2 on the right side of the window measuring the same distance back from the front of the frame.
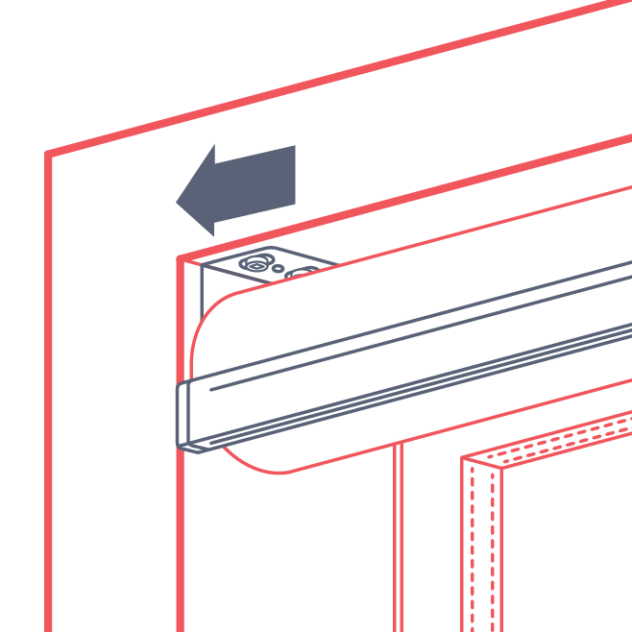
Step 3
Lift the blind up to the window with the controls on the side selected when ordering.
Place the spring pin-end into the bracket first (the opposite end to the chain).
Tip: Always handle blinds with clean hands to avoid leaving marks or damaging the material.
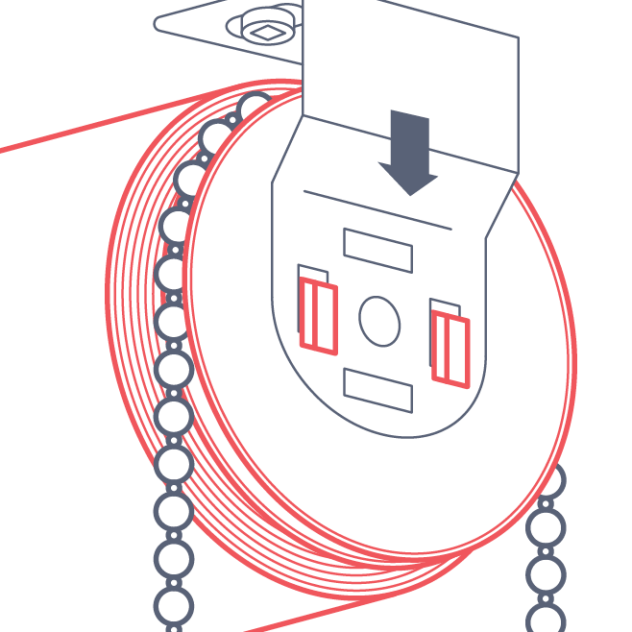
Step 4
Applying pressure toward the pin end (to depress the pin), move the chain end of the blind into the bracket.
Pull down gently until the hooks set into the bracket.
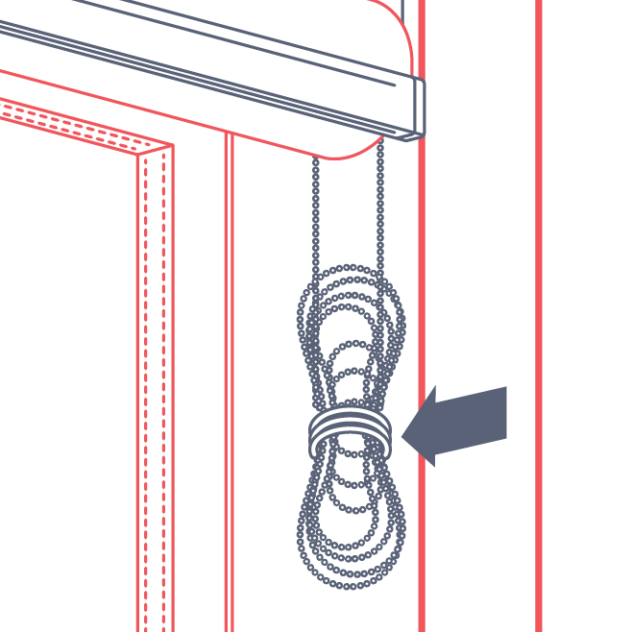
Step 5
Remove the rubber band from the chain to operate the blind.
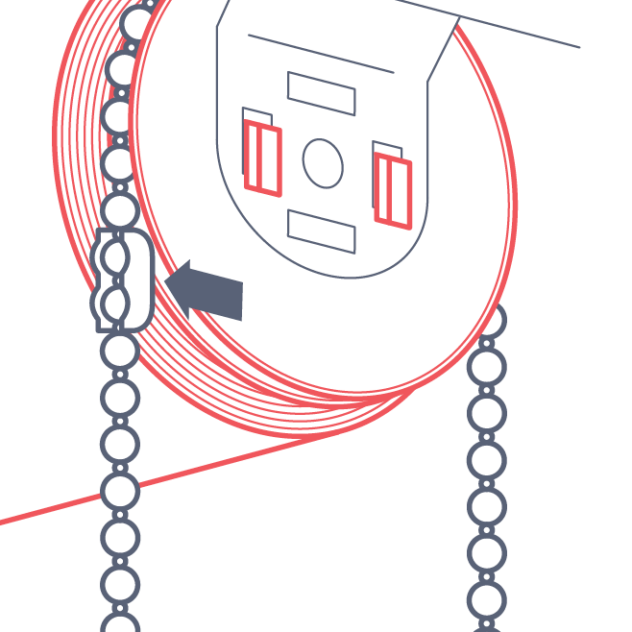
Step 6
2 x ball stops
Attaching ball stops ensures the blind is not wound up or down too far, preventing damage.
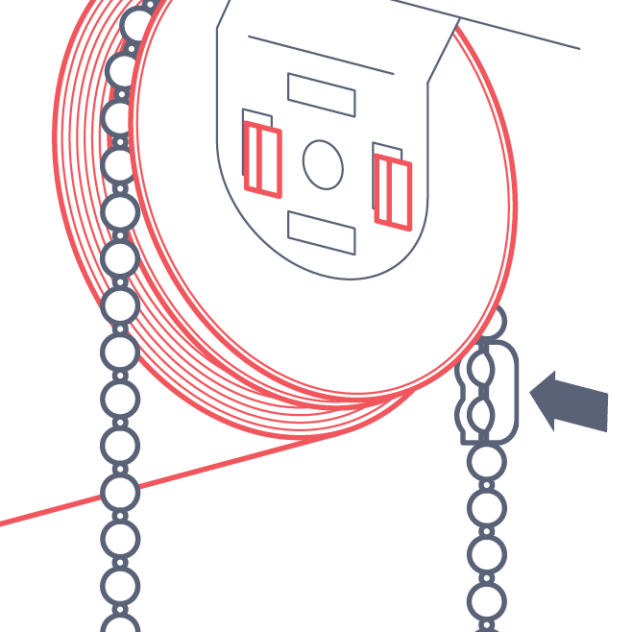
Roll the blind to the top of its range, note the position on the chain and attach a ball stop.
Roll the blind to the bottom of its range, note the position on the chain and attach a ball stop.
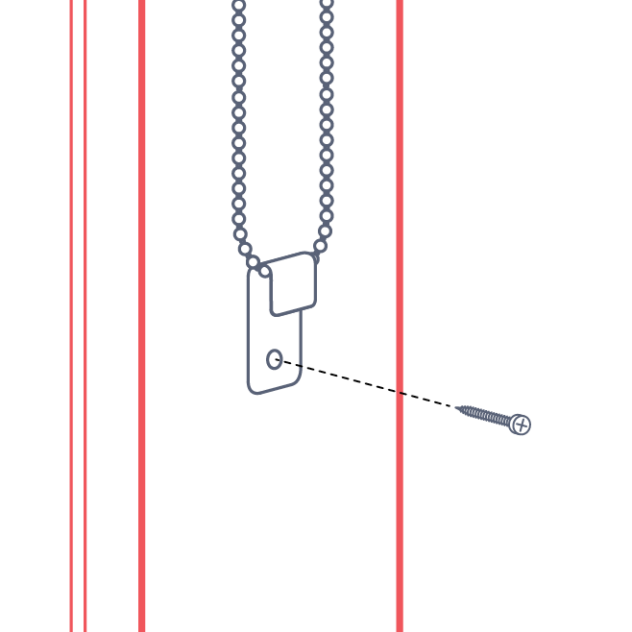
Step 7
1 x child safety tensioner with screw
Place the tensioner over the chain and let hang to determine its fixing position before attaching using the screws provided.
Tip: Don’t pull the chain too tight, leave a little bit of give to make operating the blind easier.
Outside fit
Getting started
Being careful not to damage the blind or chain when removing the packaging, unpack the blind and check all parts are included:
- Roller blind
- 2 x universal end brackets
- 4 x screws
- 2 x bracket covers
- 2 x ball stops
- 1 x child safety tensioner with screw
Tools required:
- Pencil
- Tape measure
- Electric screwdriver
- #2 square drive
Illustrated steps
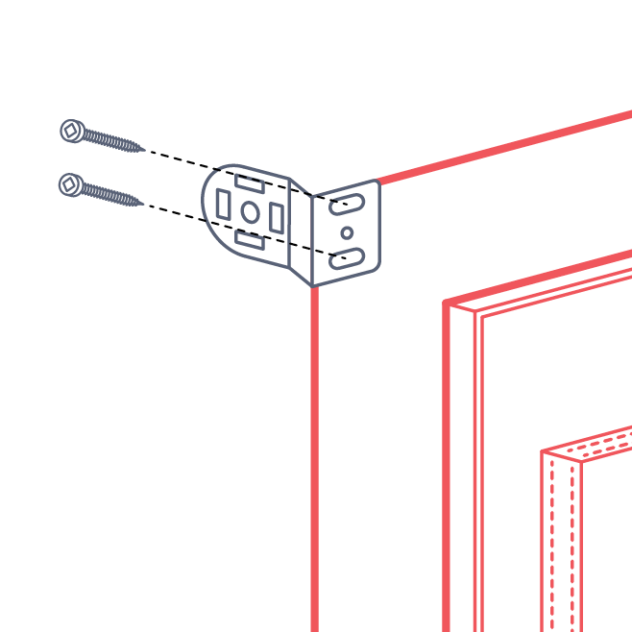
Step 1
1 x universal end bracket
2 x screws
At the position originally measured from, fix one universal end bracket to the architrave or wall on the left side of the window using two of the screws provided.
Tips: If positioning on the architrave, pre-drill the holes to prevent splitting. If fixing to the wall you may need to pack out the brackets and use longer screws to allow the blind to clear the window reveal when installed.
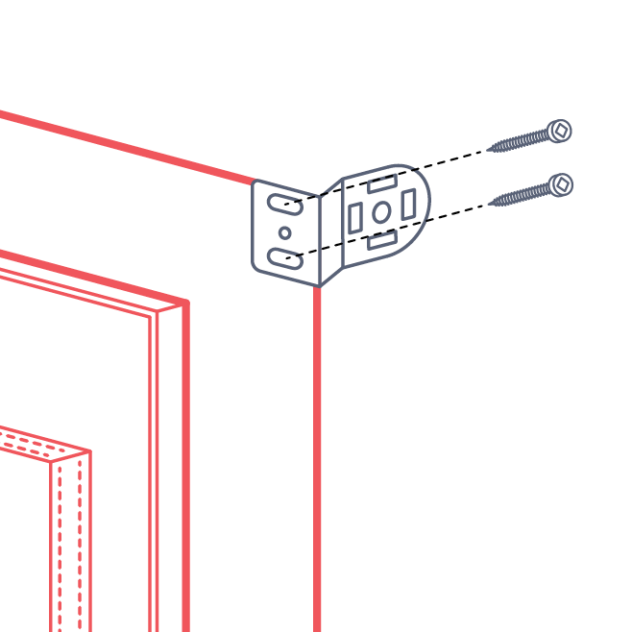
Step 2
1 x universal end bracket
2 x screws
Repeat step 2 on the right side of the window.
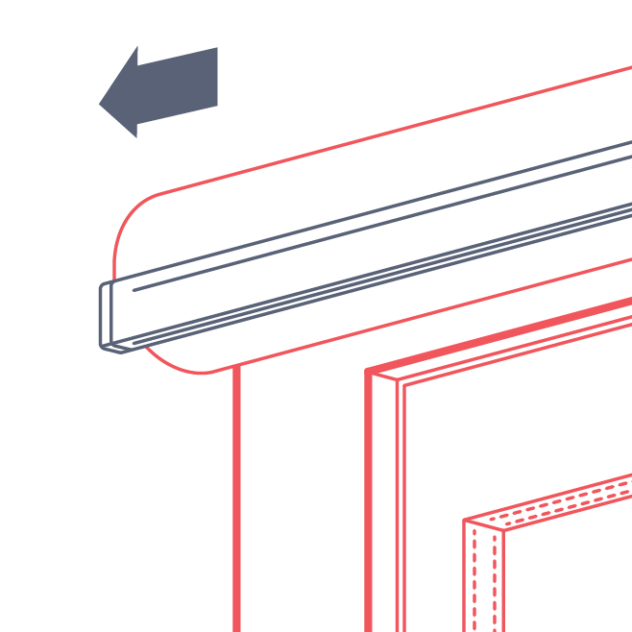
Step 3
Lift the blind up to the window with the controls on the side selected when ordering.
Place the spring pin-end into the bracket first (the opposite end to the chain).
Tip: Always handle blinds with clean hands to avoid leaving marks or damaging the material.
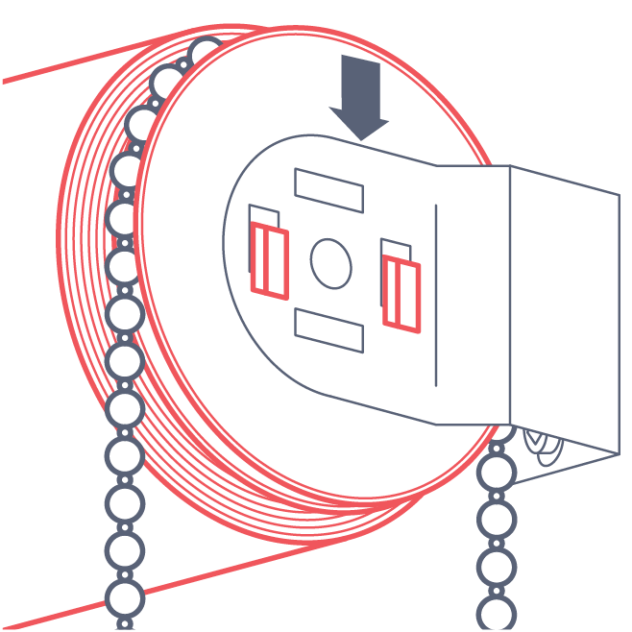
Step 4
Applying pressure toward the pin end (to depress the pin), move the chain end of the blind into the bracket.
Pull down gently until the hooks set into the bracket.
Step 5
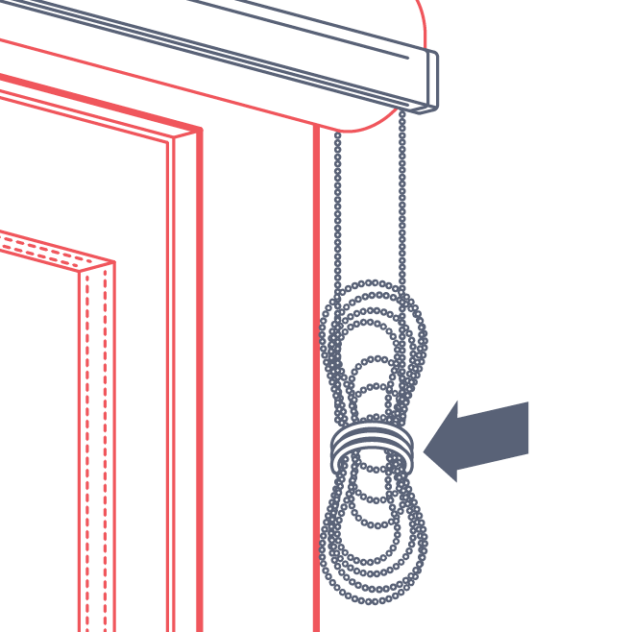
Remove the rubber band from the chain to operate the blind.
Step 6
2 x ball stops
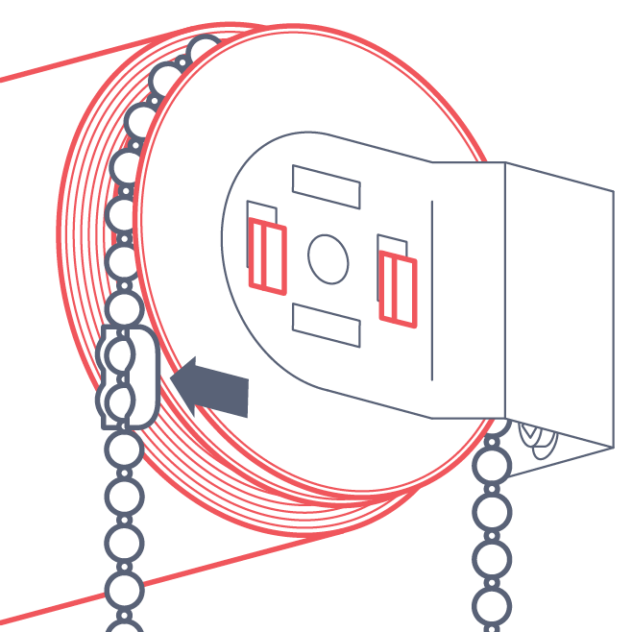
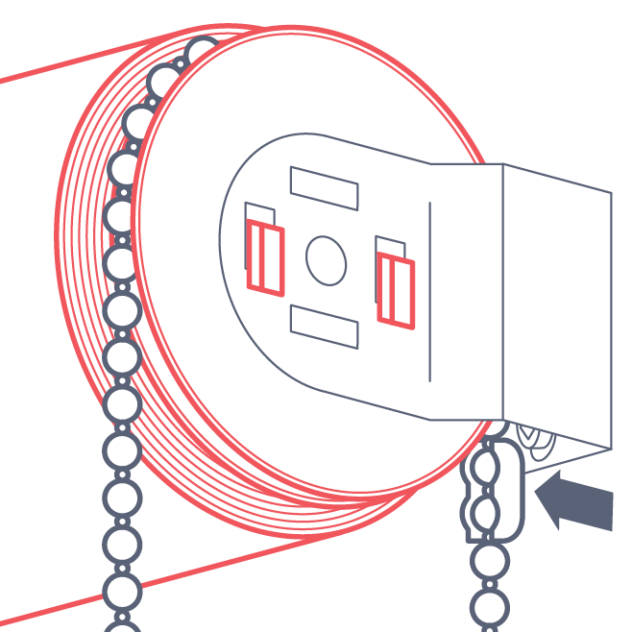
Attaching ball stops ensures the blind is not wound up or down too far, preventing damage.
Roll the blind to the top of its range, note the position on the chain and attach a ball stop.
Roll the blind to the bottom of its range, note the position on the chain and attach a ball stop.
Step 7
1 x child safety tensioner with screw
2 x bracket covers
Slide the bracket covers over the brackets. This creates a neater look.
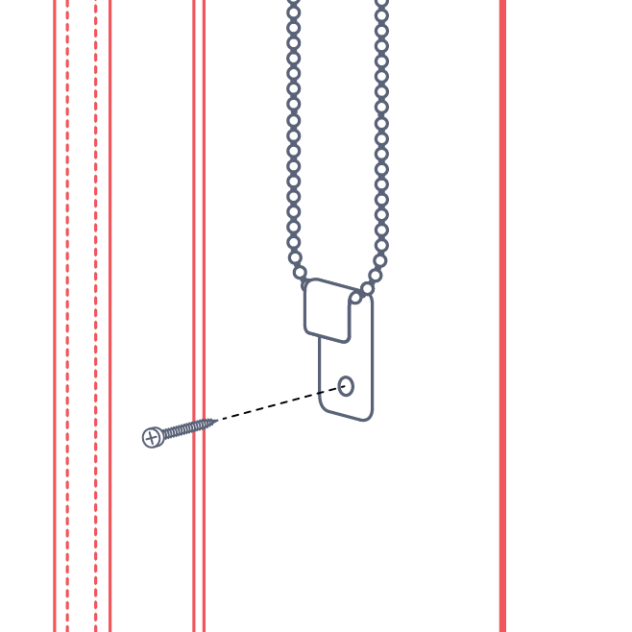
Place the tensioner over the chain and let hang to determine its position then fix using the screws provided.
Tip: Don’t pull the chain too tight, leave a little bit of give to make operating the blind easier.