Aluminium venetian blinds install guides
Use our step-by-step guides to install your new blinds like a pro. We have installation guides for inside and outside fit.
Inside fit
Getting started
Being careful not to damage the blind or cords when removing the packaging, unpack the blind and check all parts are included:
- Venetian blind
- Top fixing brackets with 1 x screw per bracket
- 1 x hex tilt wand with cord cleats
Tools required:
- Pencil
- Tape measure
- #2 square screwdriver
Illustrated steps
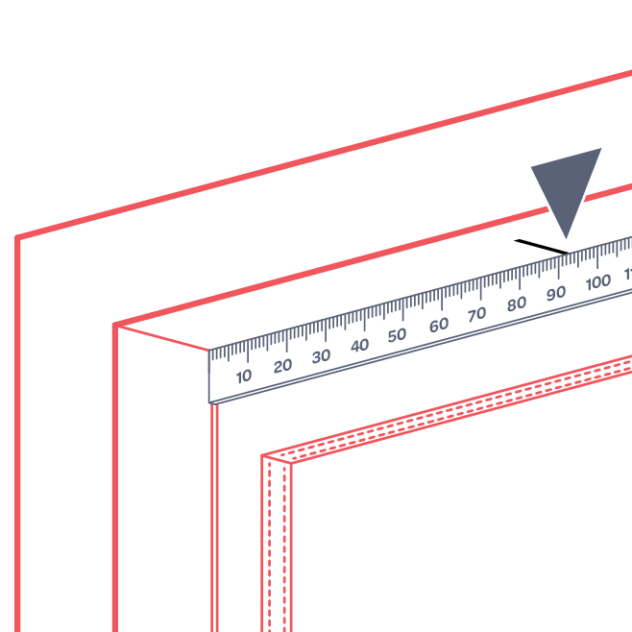
Step 1
On the same side as the control (e.g. the above is a left hand control) at the inside top of the window frame, mark 92mm in with a pencil.
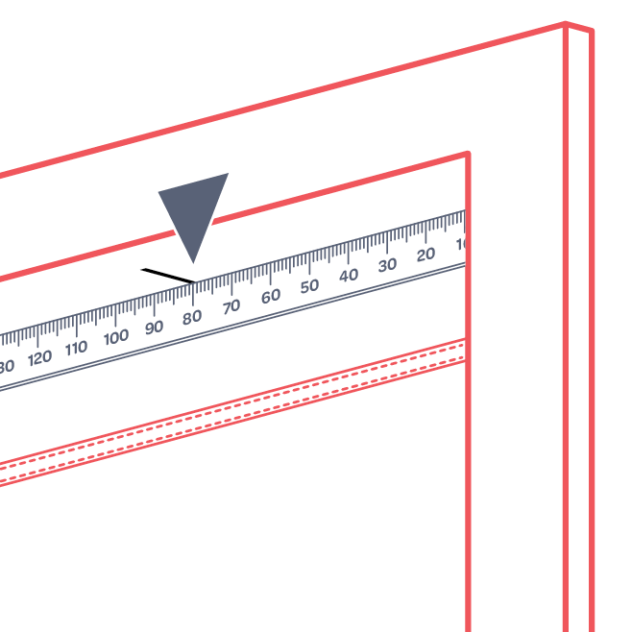
Step 2
On the other side of the window place a mark on the inside of the window frame 80mm in.
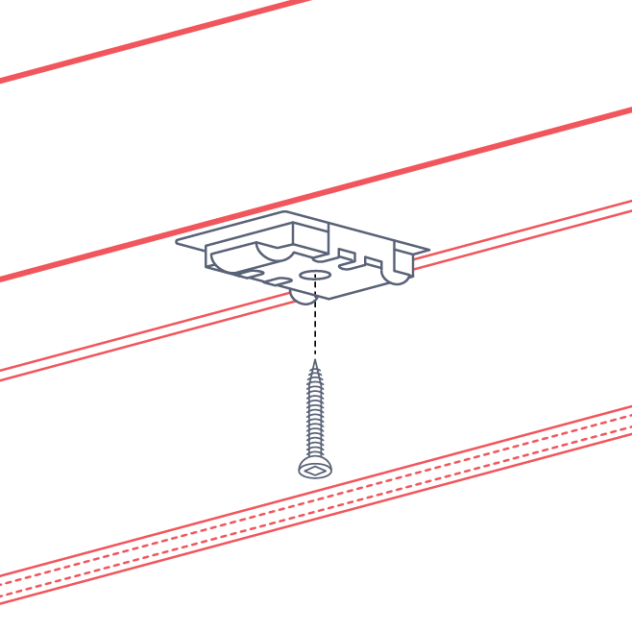
Step 3
Top fix brackets with screws
Fix each bracket to the top side of the window with a single screw, lined up with the marks made in steps 1 and 2.
Step 4
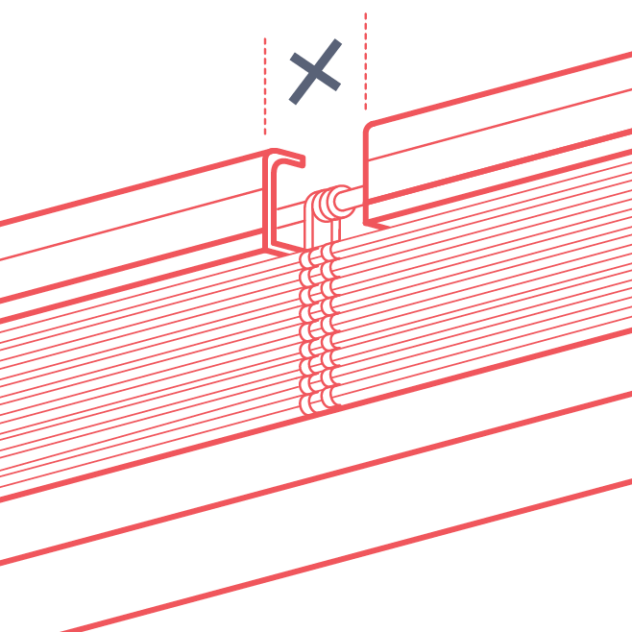
With any remaining brackets (supplied if required), space them evenly between the left and right side brackets, being careful they won’t interfere with the ladders of the blind when installed.
Step 5
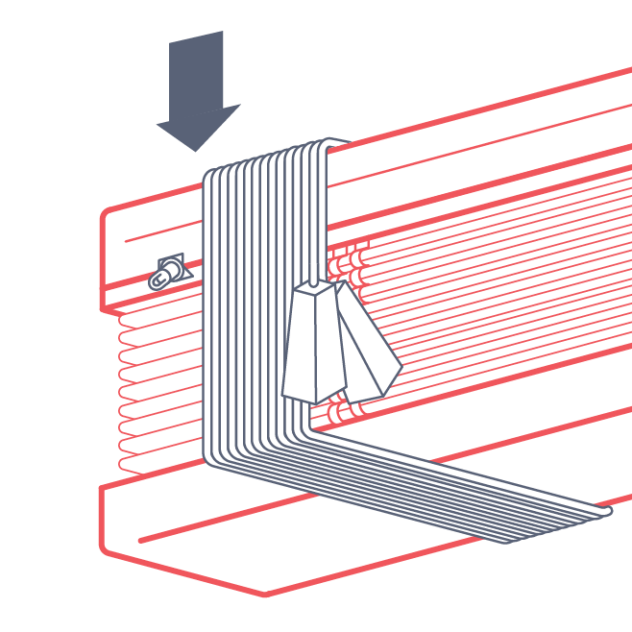
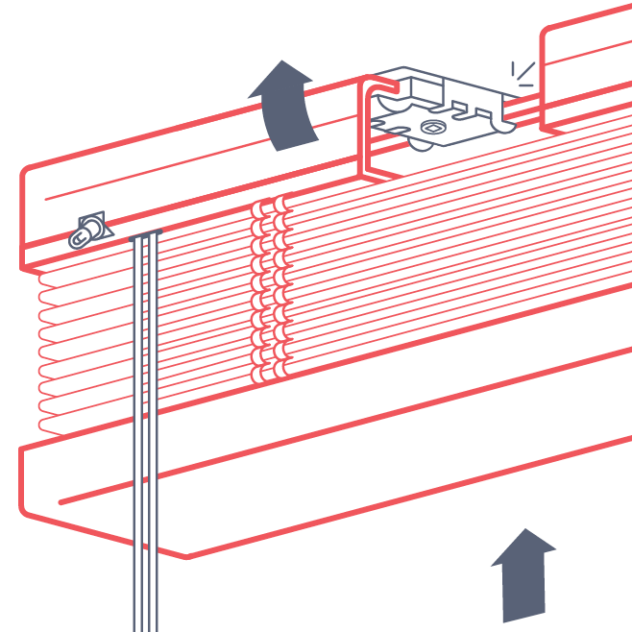
Unwind the cords from the control end. Holding the blind closed, align the front of the headrail to the brackets and tilt the base outwards to allow the headrail to ‘hook’ onto the front of each bracket.
Once the front is hooked, use your thumbs to push the back of the headrail up until you hear it ‘click’. Do this at each bracket to ensure the blind is secure.
Step 6
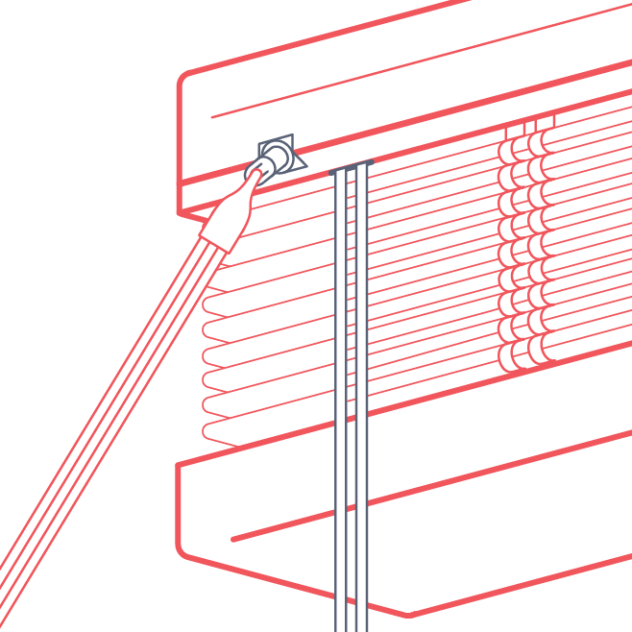
1 x hex tilt wand
Attach the hook on the hex wand to the loop on the control end of the blind.
Step 7
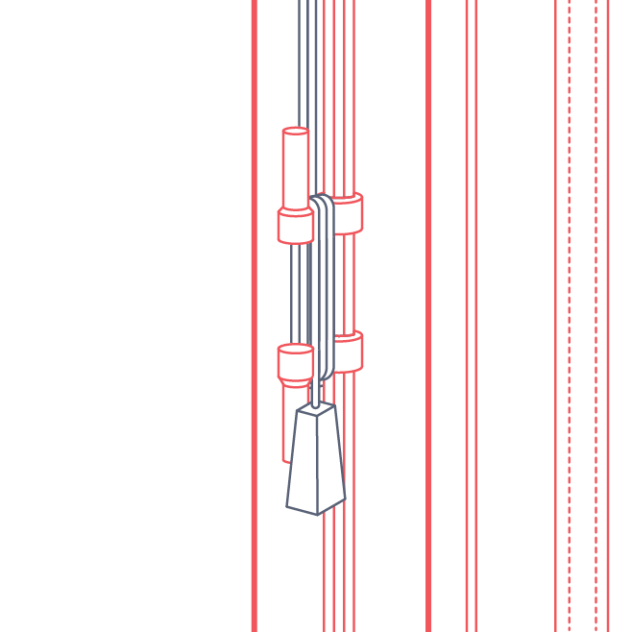
1 x cord cleat with screws
Cord cleats are attached to the hex wand to store excess cord when the blind is in the ‘up’ position.
Blind operation: To lower, hold the group of cords across the face of the blind and pull gently to release the cord lock before lowering the blind. To tilt the blind, twist the hex tilt wand.
Outside fit
Getting started
Being careful not to damage the blind or cords when removing the packaging, unpack the blind and check all parts are included:
- Venetian blind
- Top fixing brackets with 1 x screw per bracket
- 1 x hex tilt wand with cord cleat
Tools required:
- Pencil
- Tape measure
- #2 square screwdriver
Illustrated steps
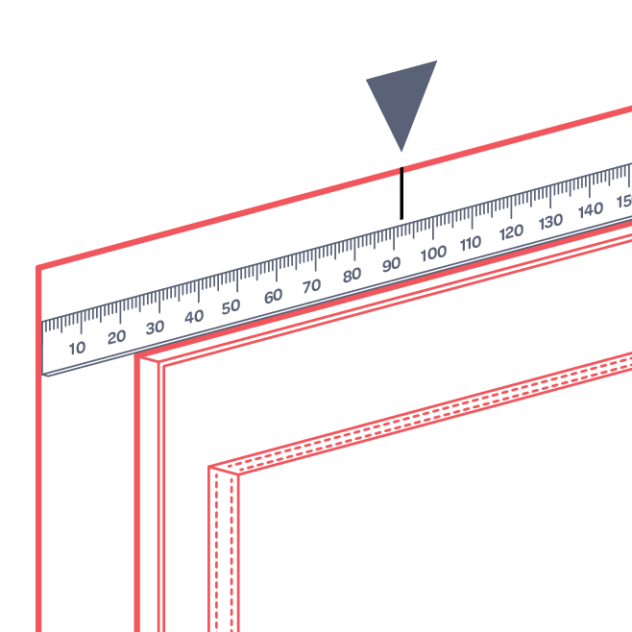
Step 1
On the same side as the control (e.g. the above is a left hand control) mark the wall or window frame level with the top of the blind and 92mm in from the position first measured from.
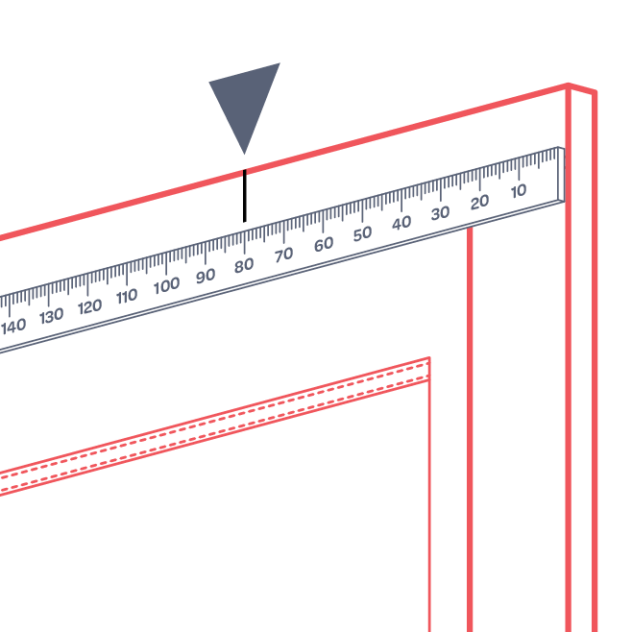
Step 2
On the other side of the window place a mark level with the top of the blind and 80mm in from the end.

Step 3
Universal end brackets with screws
Fix each bracket to the architrave or wall using a single screw, lined up with the marks made in steps 1 and 2.
Tips: If fixing close to the architrave edge, pre-drill the holes to prevent splitting.
If fixing to the wall you may need to pack out the bracket and use longer screws to allow the blind to clear the window reveal when installed.
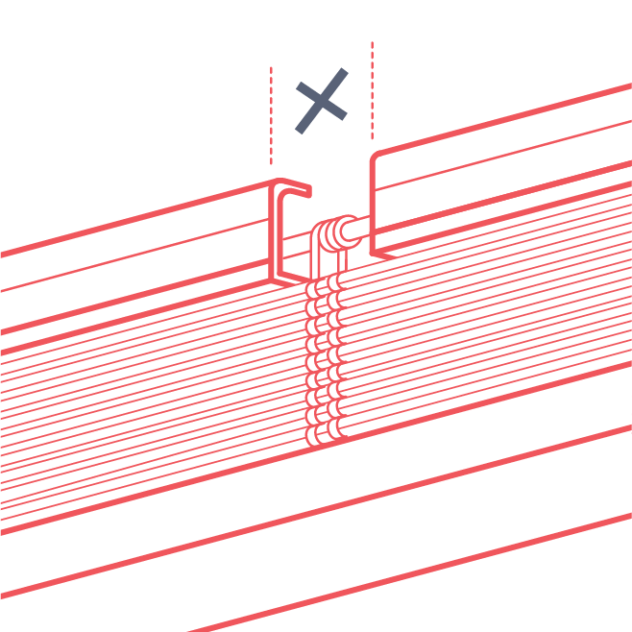
Step 4
With any remaining brackets (supplied if required), space them evenly between the left and right side brackets, being careful they won’t interfere with the ladders of the blind once installed.
Step 5
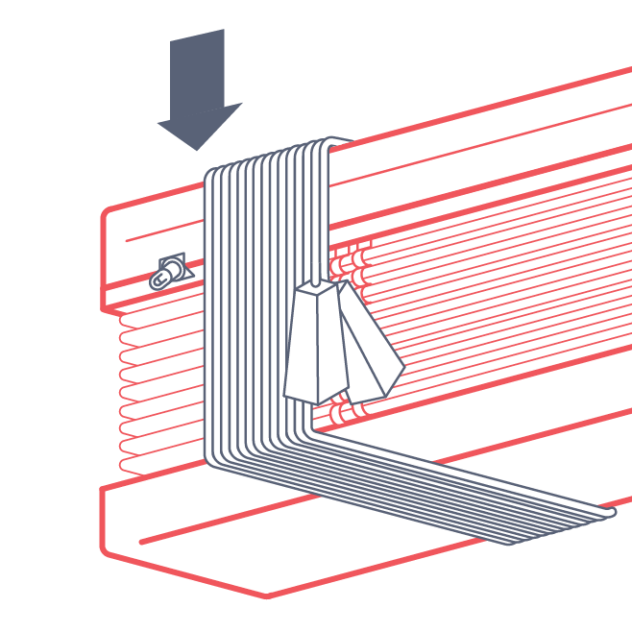
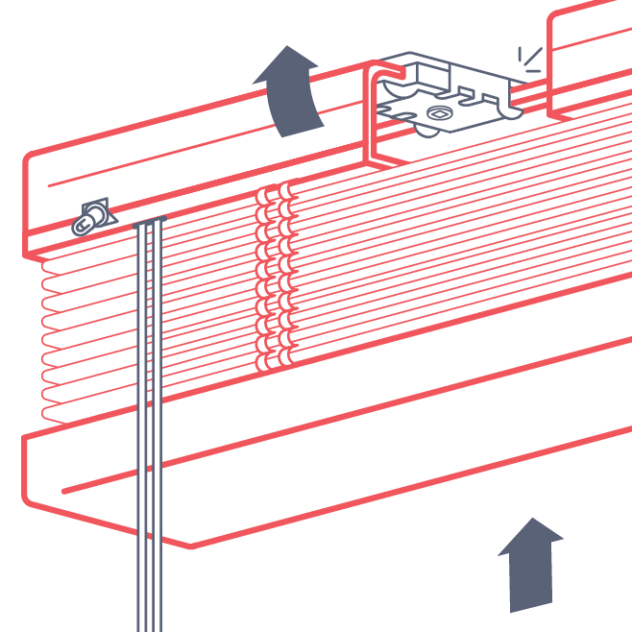
Unwind the cords from the control end. Holding the blind closed align the front of the headrail to the brackets and tilt the base outwards to allow the headrail to “hook” onto the front of each bracket.
Once the front is hooked, use your thumbs to push the back of the headrail up until you hear it “click”. Do this at each bracket to ensure the blind is secure.
Step 6
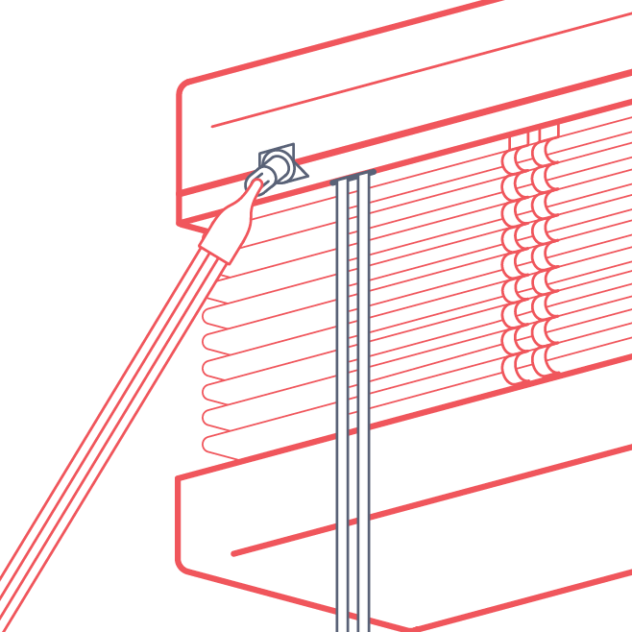
1 x hex tilt wand
Attach the hook on the hex wand to the loop on the control end of the blind.
Step 7
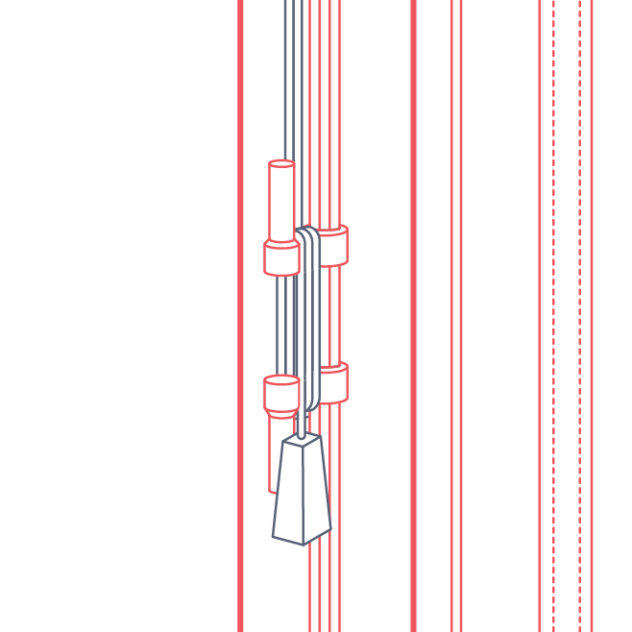
1 x cord cleat with screws
Cord cleats are attached to the hex wand to store excess cord when the blind is in the ‘up’ position.
Blind operation: To lower, hold the group of cords across the face of the blind and pull gently to release the cord lock before lowering the blind. To tilt the blind, twist the hex tilt wand.